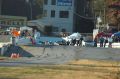
| Thumbnail |
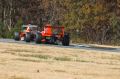
Image Name |
Date |
Run Group |
Session |
Caption |

|
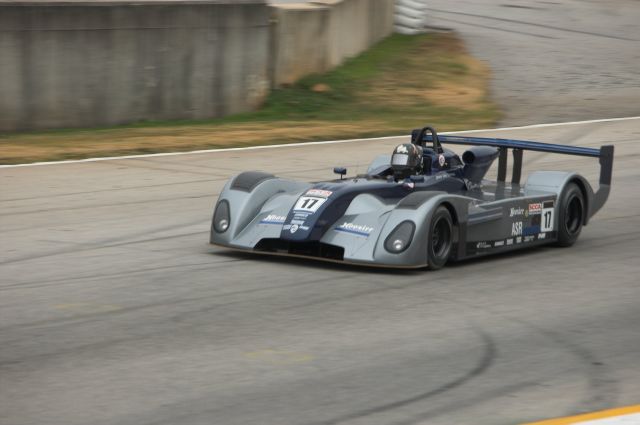
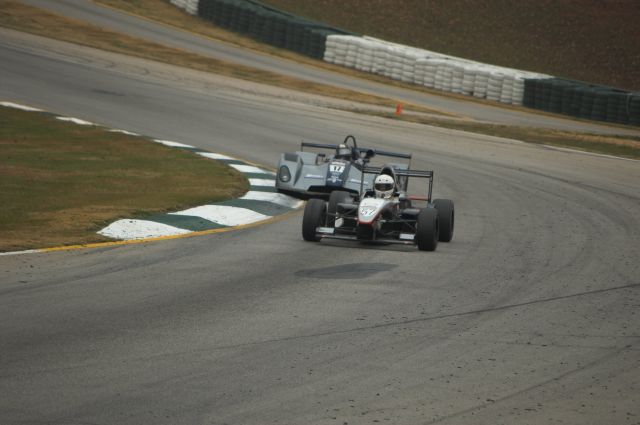
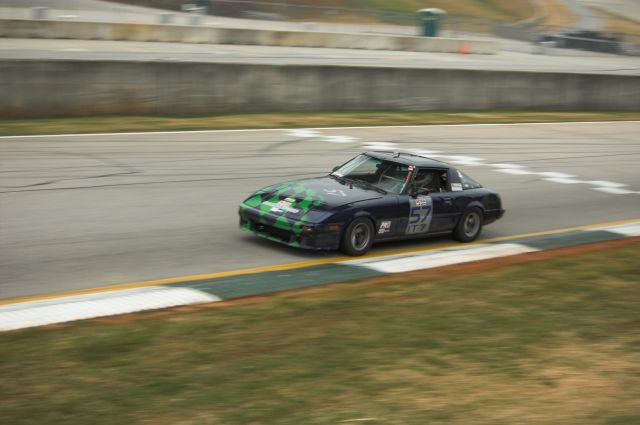
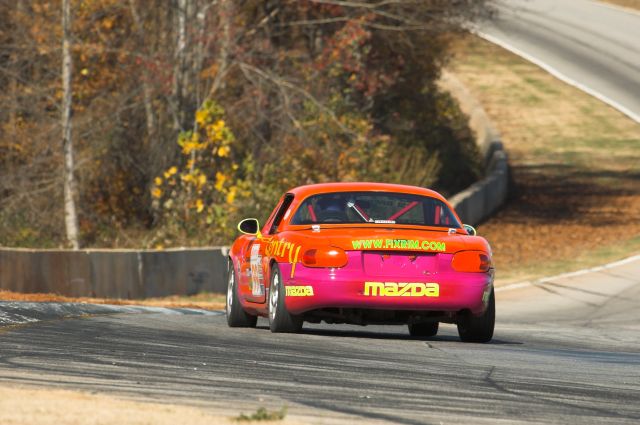
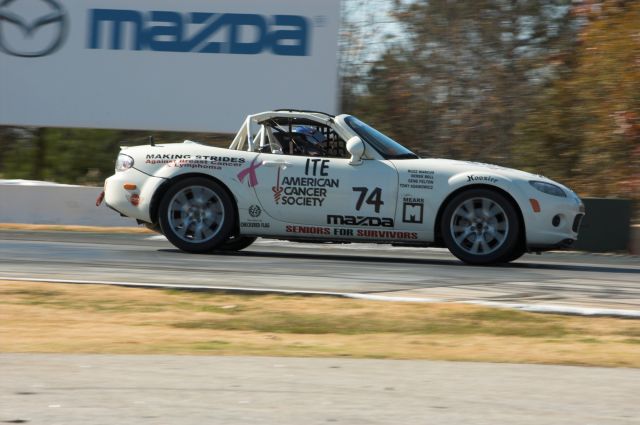
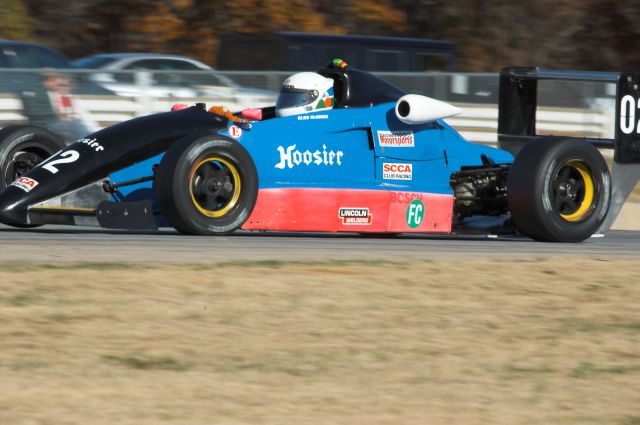
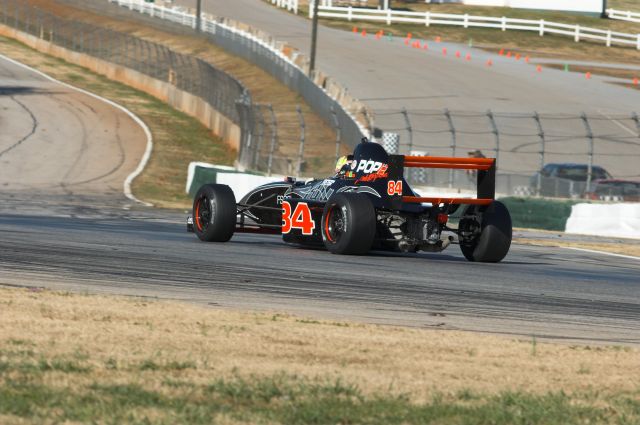
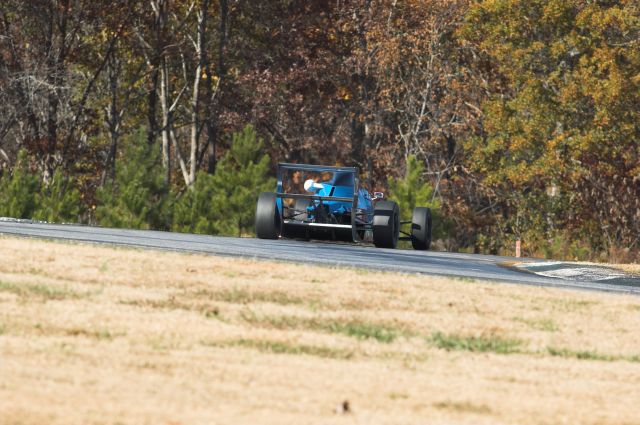
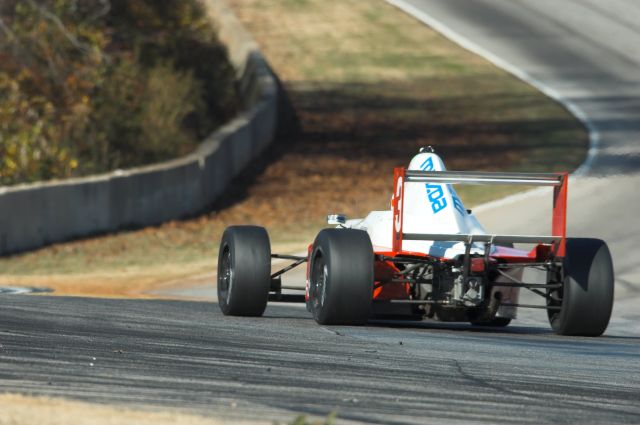
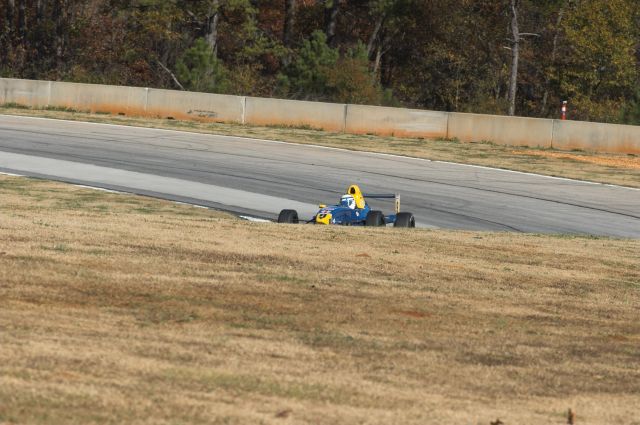
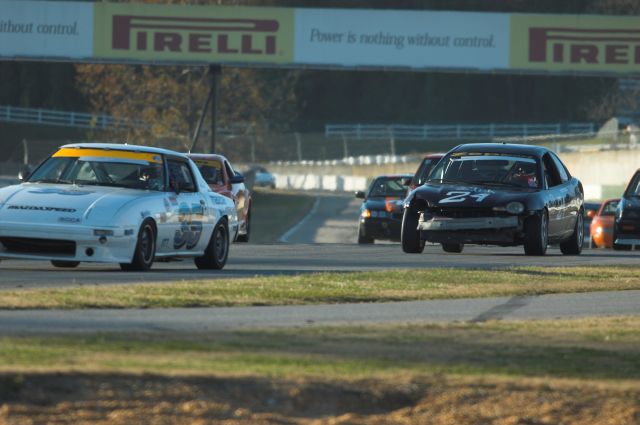
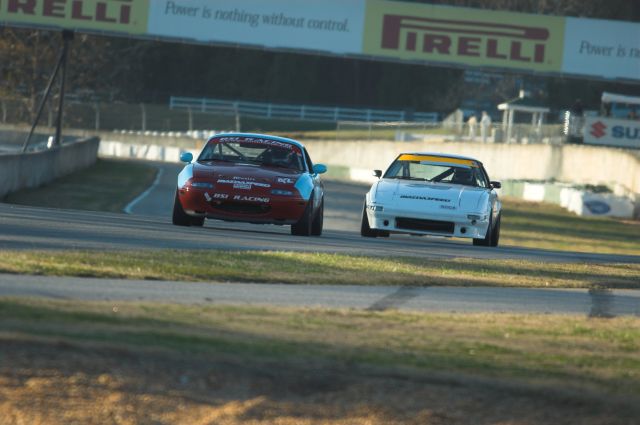
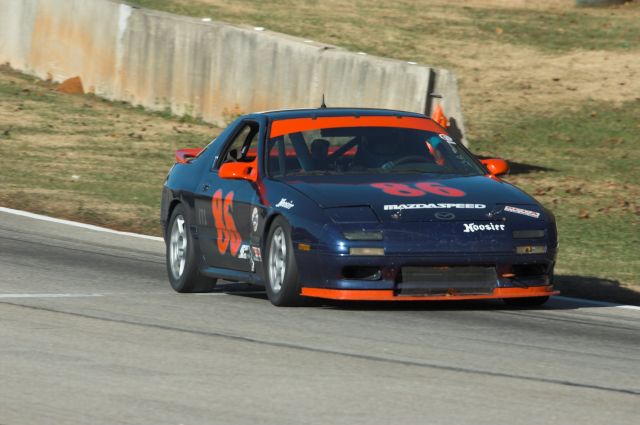
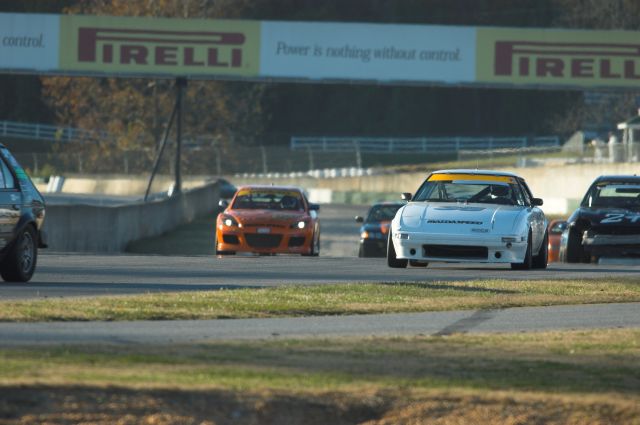
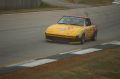
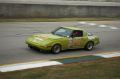
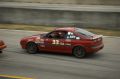
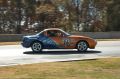
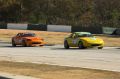
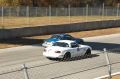
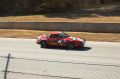
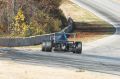
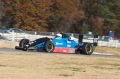
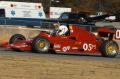
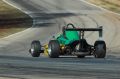
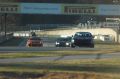
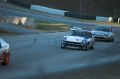
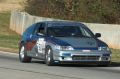
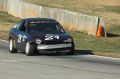
IMGP3094.jpg |
Nov 11 |
4 |
Race |
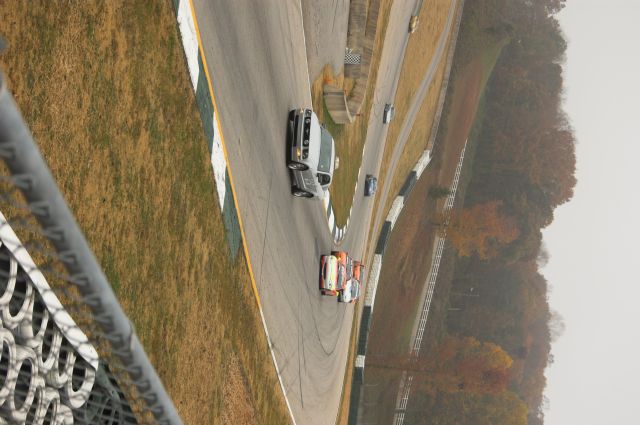
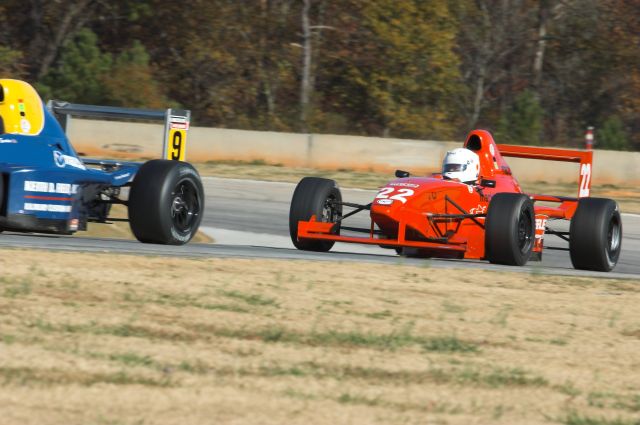
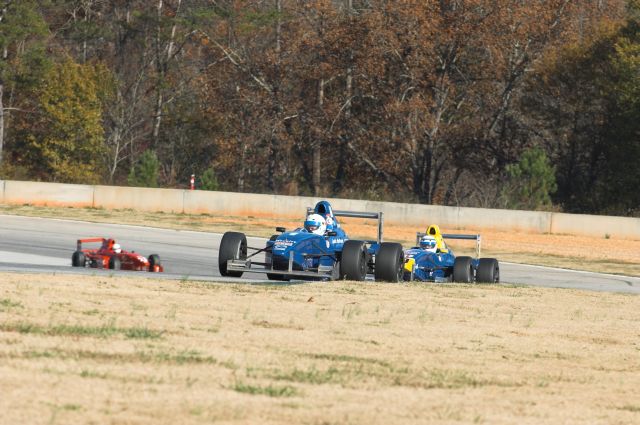
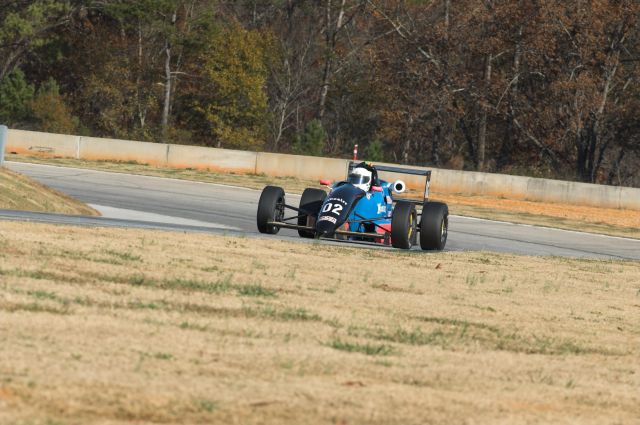
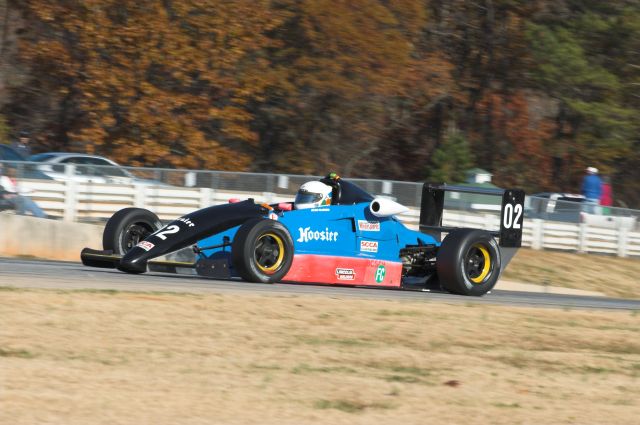
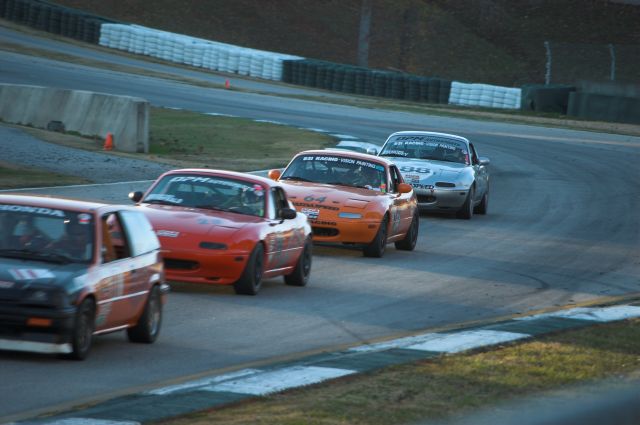
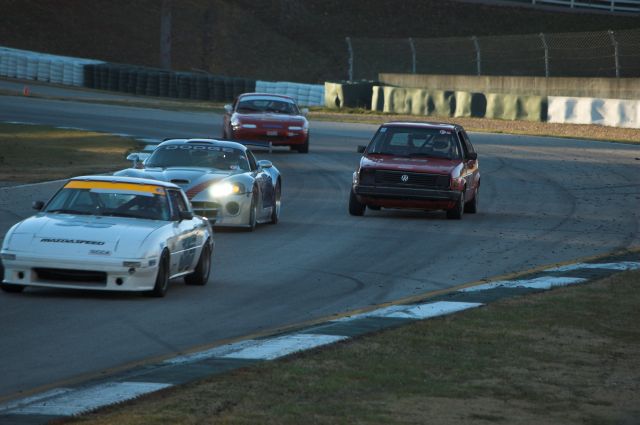
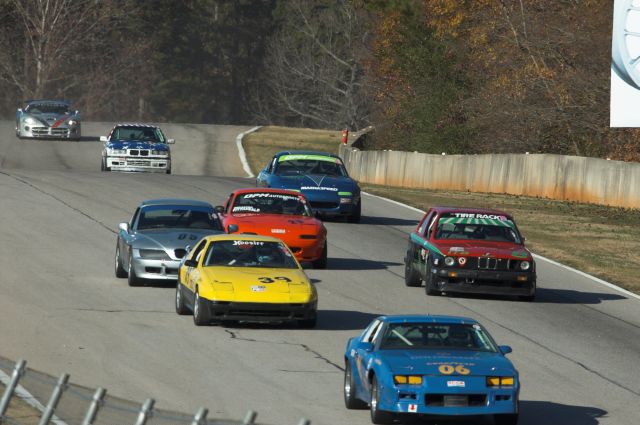
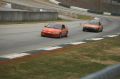
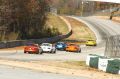
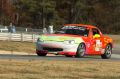
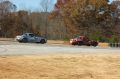
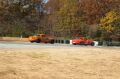
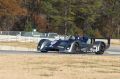
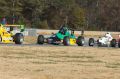
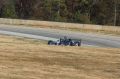
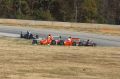
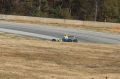
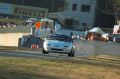
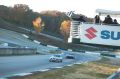
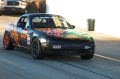
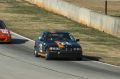
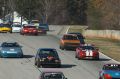
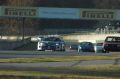
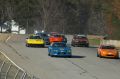
Passing through Turn 12 during the Group 4 ARRC race |
|
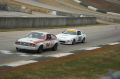
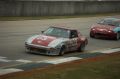
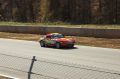
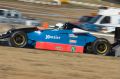
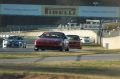
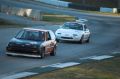
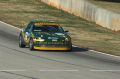
IMGP3093.jpg |
Nov 11 |
4 |
Race |
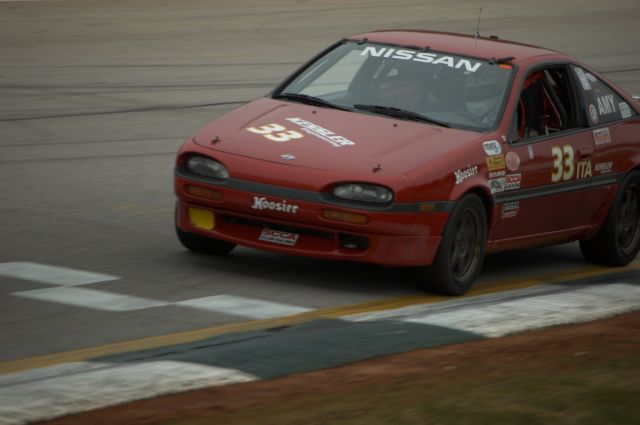
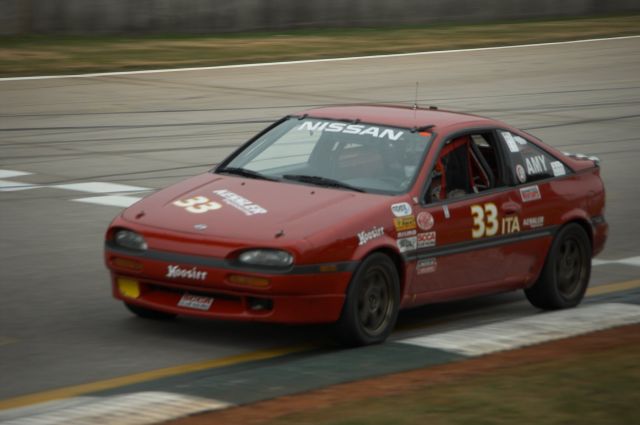
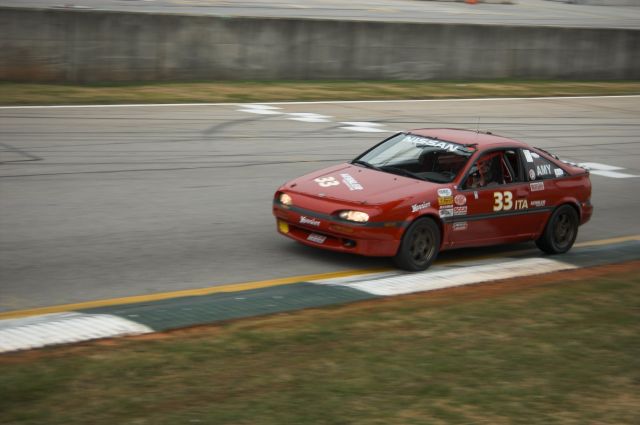
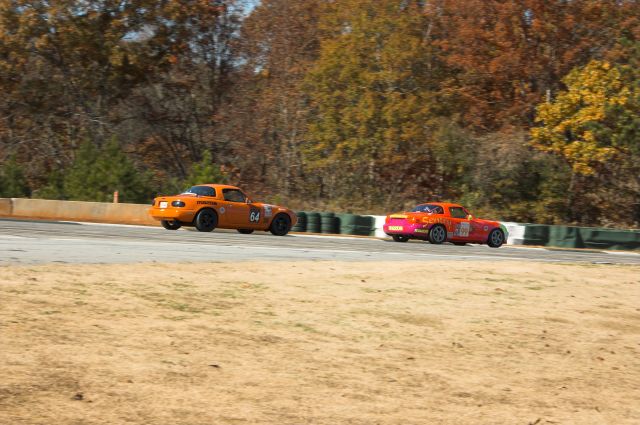
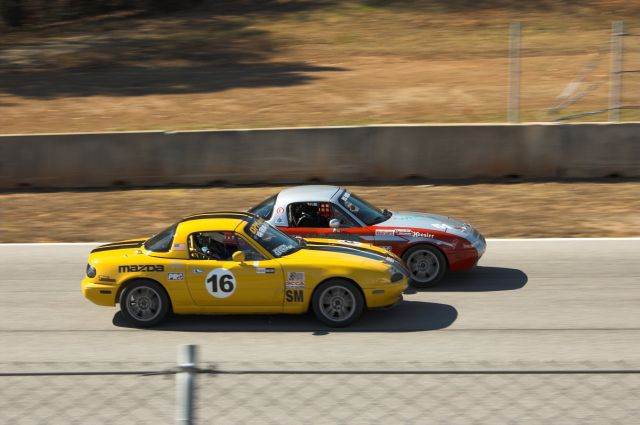
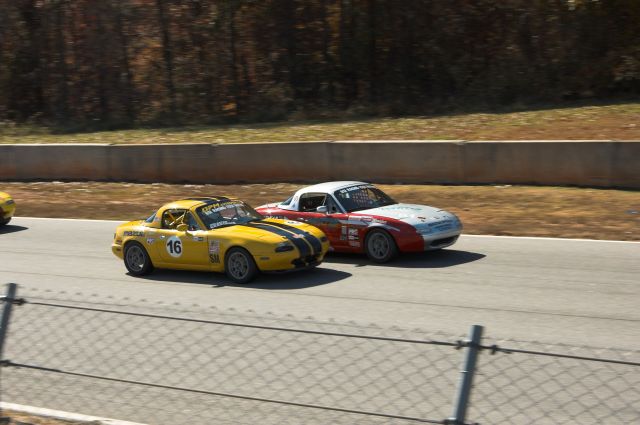
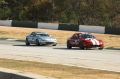
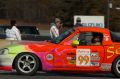
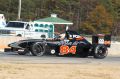
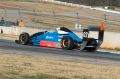
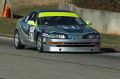
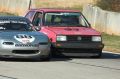
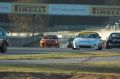
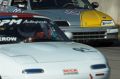
Greg Amy's ITA #33 Nissan NX2000 screams down the front stretch on its way to a win in the Group 4 race |

|
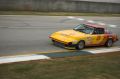
IMGP3090.jpg |
Nov 11 |
4 |
Race |
Greg Amy's ITA #33 Nissan NX2000 screams down the front stretch on its way to a win in the Group 4 race |
|
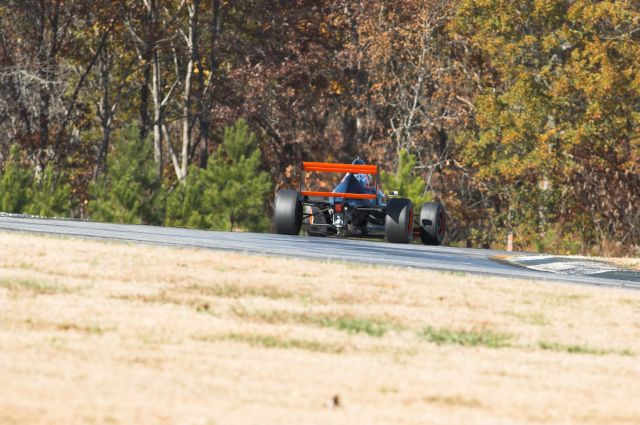
IMGP3096.jpg |
Nov 11 |
4 |
Race |
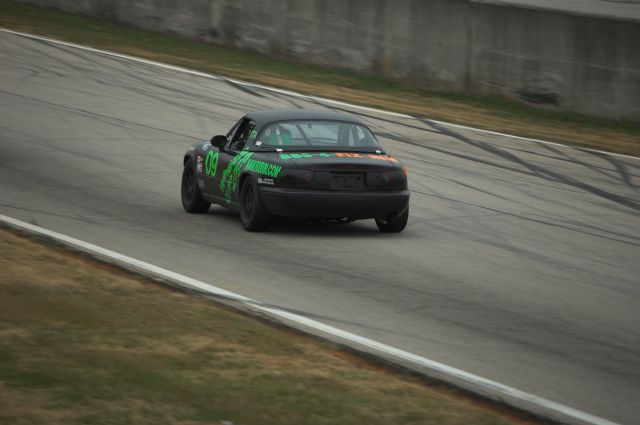
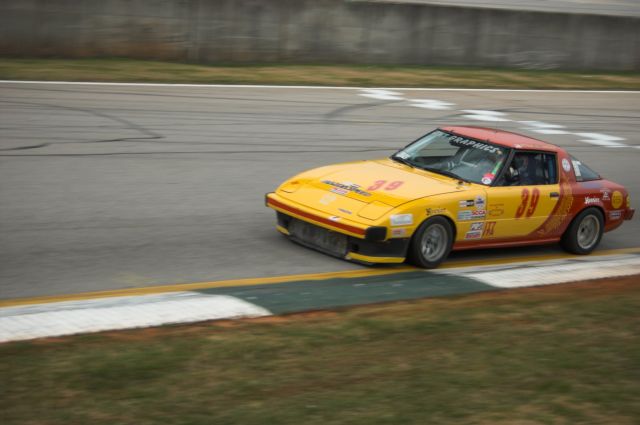
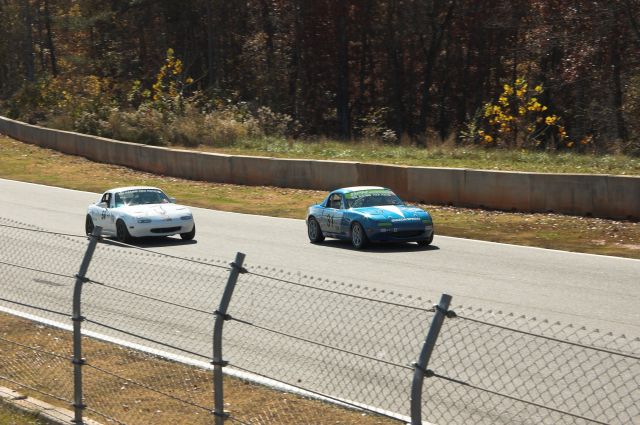
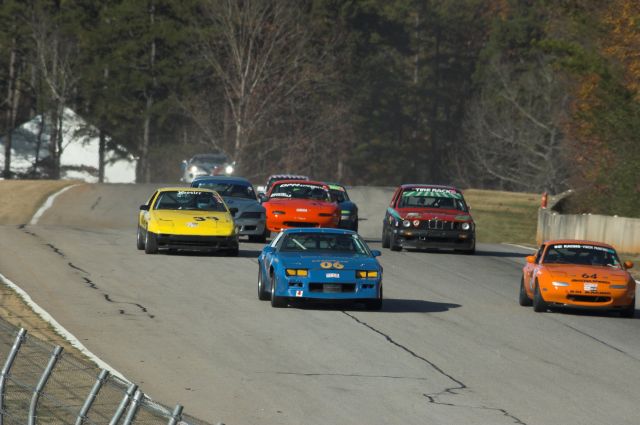
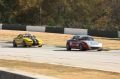
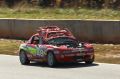
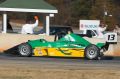
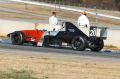
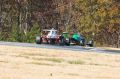
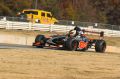
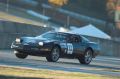
Atlanta Region's Attila Lukacs takes his IT7 #39 down the front straight |
|
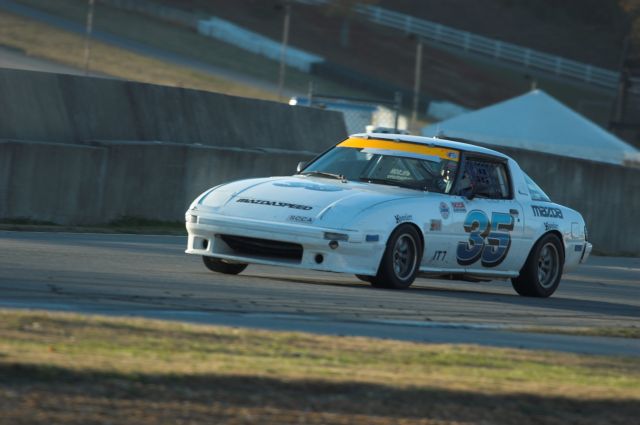
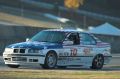
IMGP3097.jpg |
Nov 11 |
4 |
Race |
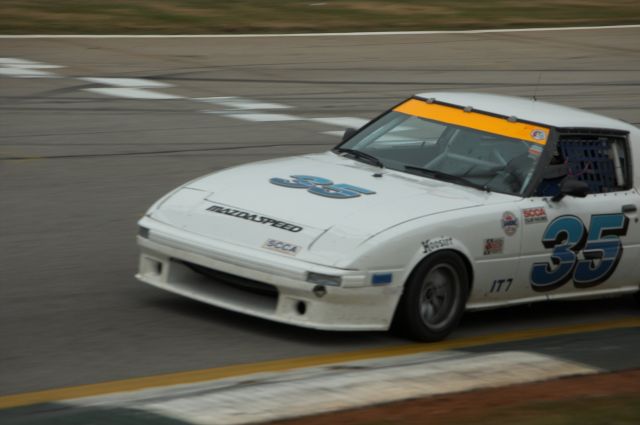
Jim Jandrisevits [IT7 #35] tries to put a lap on the ITA #94 of Ed Forrest |
|
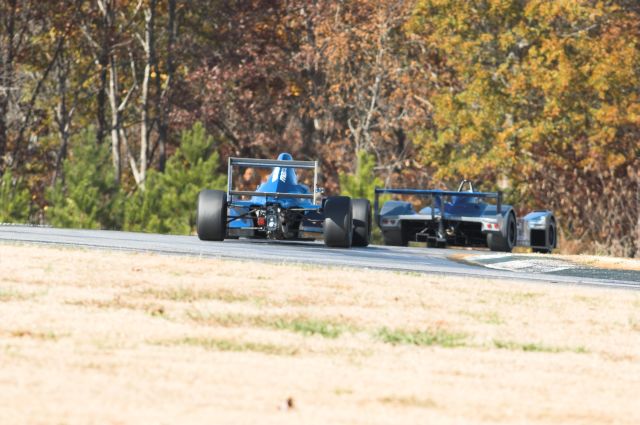
IMGP3098.jpg |
Nov 11 |
4 |
Race |
Race leader and eventual winner Greg Amy leads the field into another lap during the Group 4 ARRC race |
|
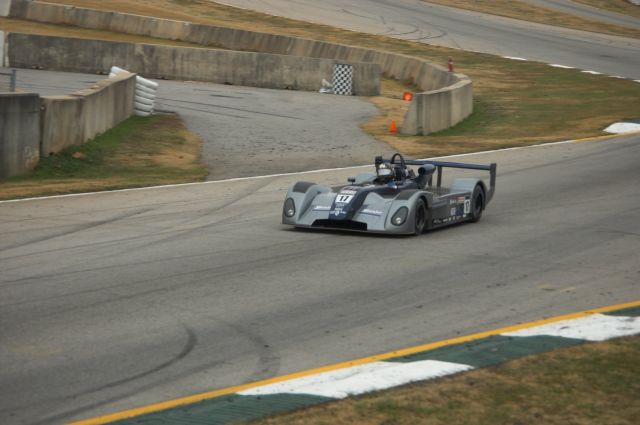
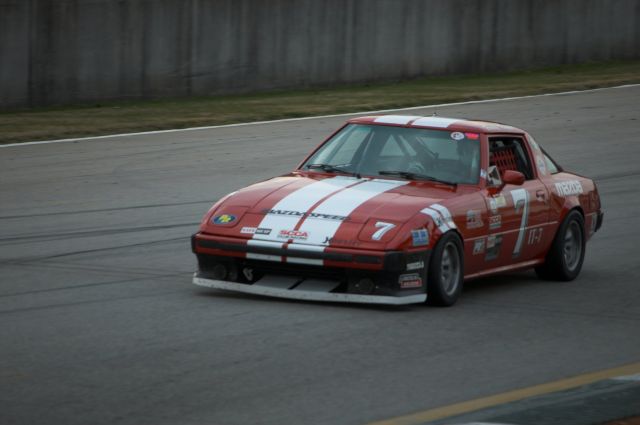
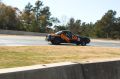
IMGP3100.jpg |
Nov 11 |
4 |
Race |
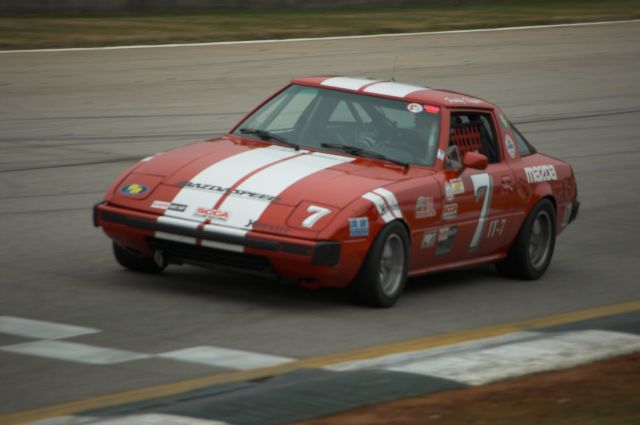
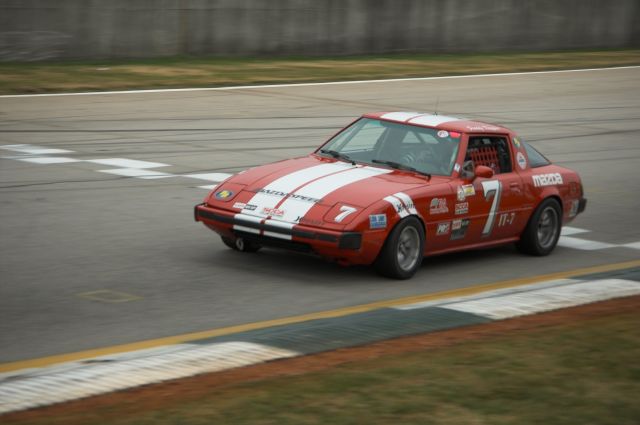
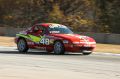
Freddy Klopper completes a lap and starts another in his IT7 #7 during the Group 4 ARRC race |
|
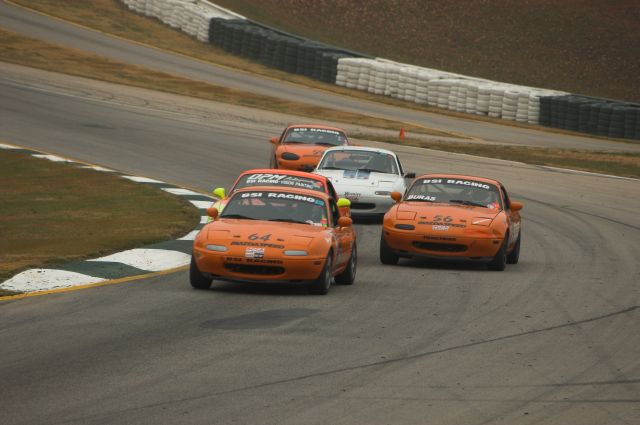
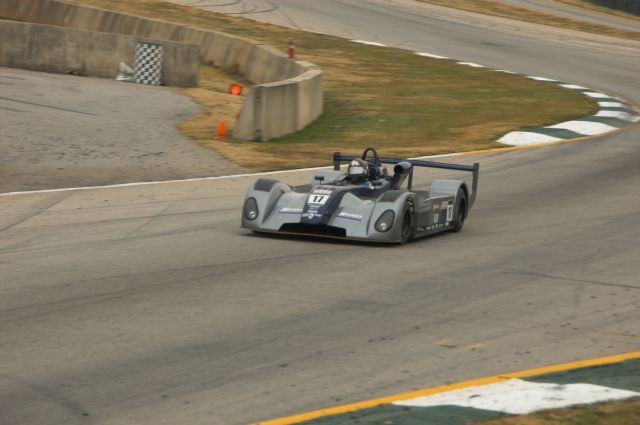
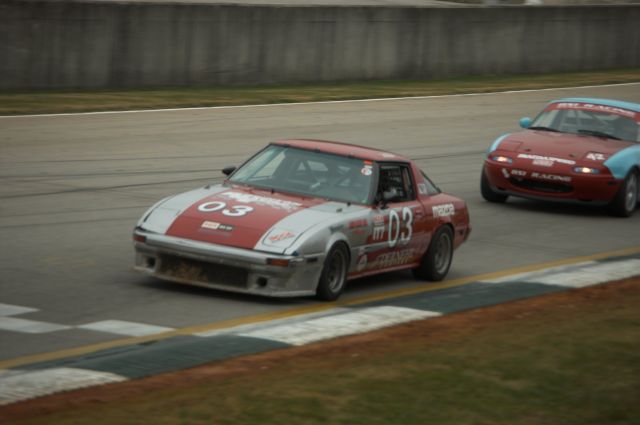
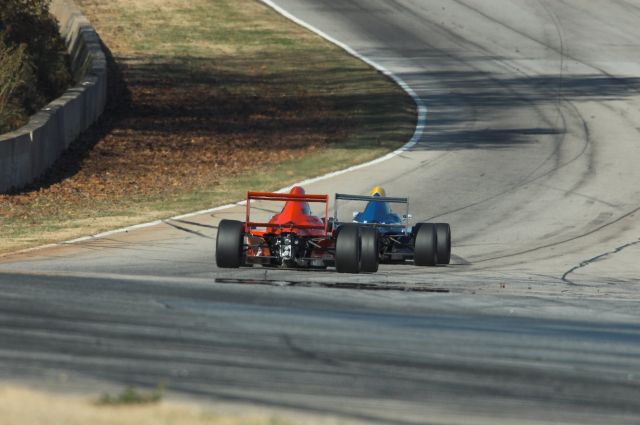
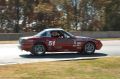
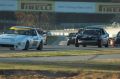
IMGP3103.jpg |
Nov 11 |
4 |
Race |
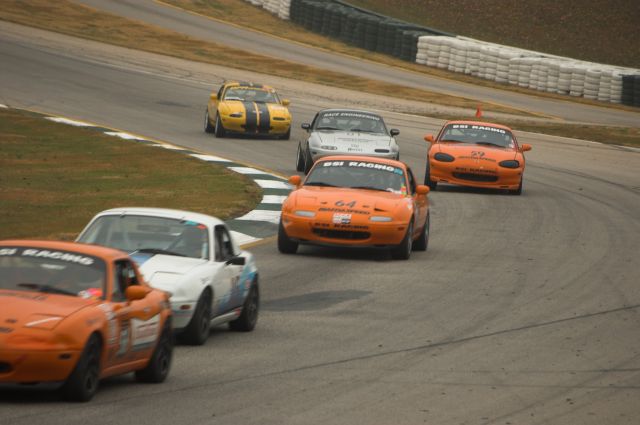
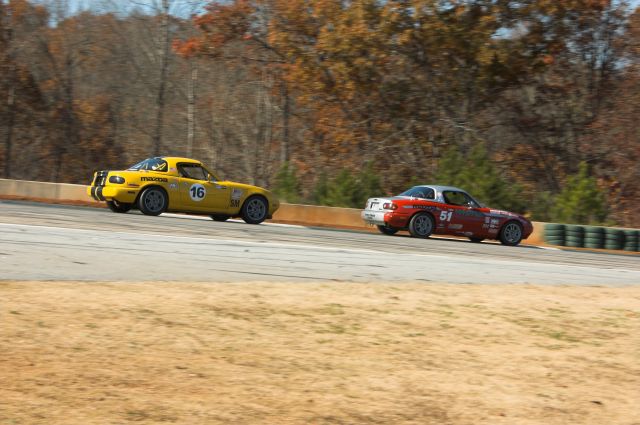
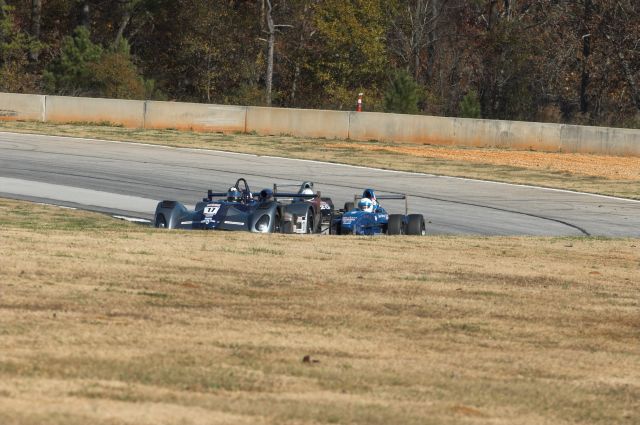
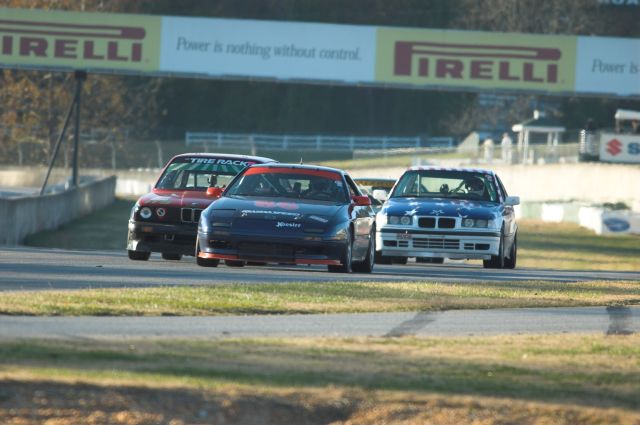
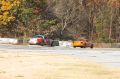
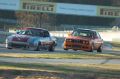
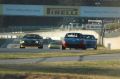
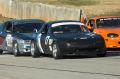
Robert Moser [ITA #36] and Kevin Ruck [ITA #3] fight it out for second place as they approach the start line during the Group 4 ARRC race |

|
IMGP3105.jpg |
Nov 11 |
4 |
Race |
Freddy Klopper completes a lap and starts another in his IT7 #7 during the Group 4 ARRC race |

|
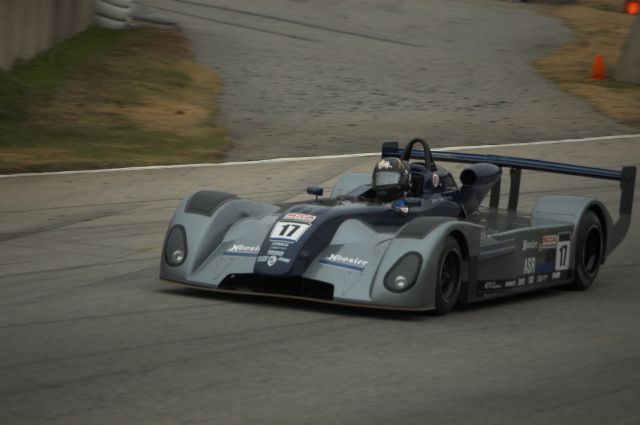
IMGP3106.jpg |
Nov 11 |
4 |
Race |
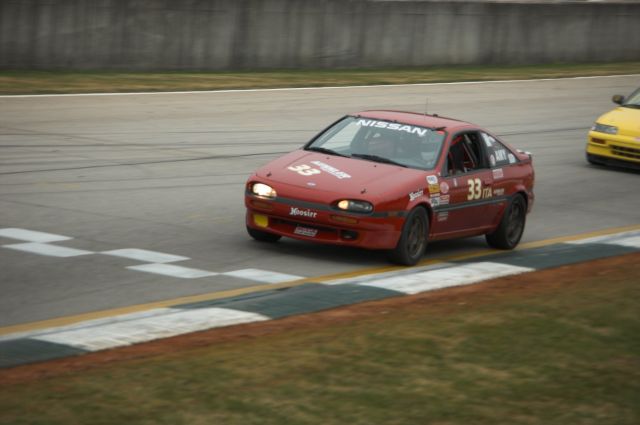
Race leader and eventual winner Greg Amy [ITA #33] starts another lap during the Group 4 ARRC race |
|
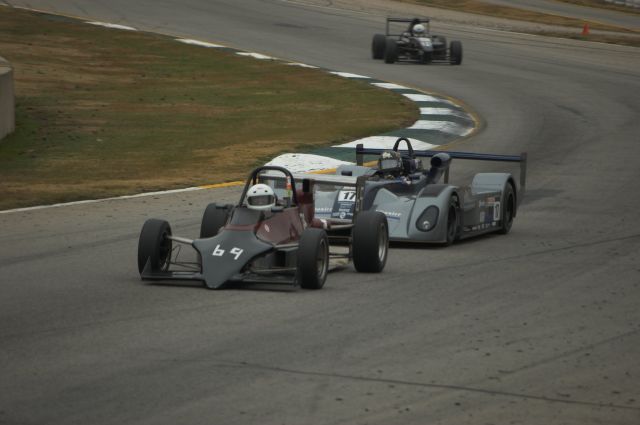
IMGP3108.jpg |
Nov 11 |
4 |
Race |
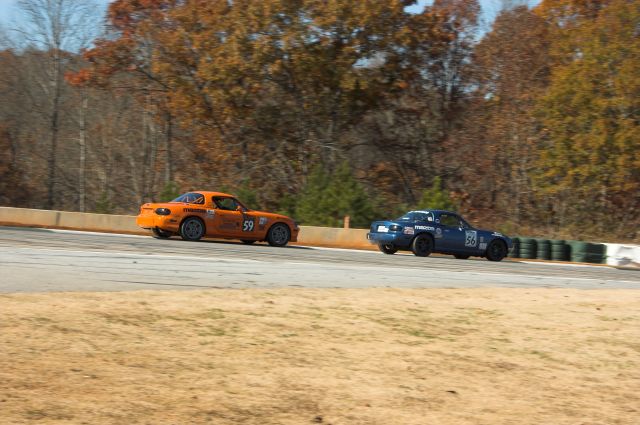
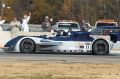
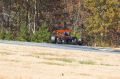
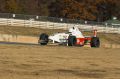
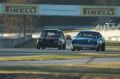
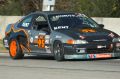
Eventual fourth place finisher Bob Stretch [ITA #09] races down the front straight in his attempt to chase down Moser [ITA #36] and Ruck [ITA #3] for P2 or P3 |
|
IMGP3089.jpg |
Nov 11 |
4 |
Race |
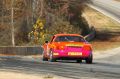
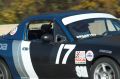
Jim Jandrisevits' IT7 #35 heads down the front straight |
|
IMGP3087.jpg |
Nov 11 |
4 |
Race |
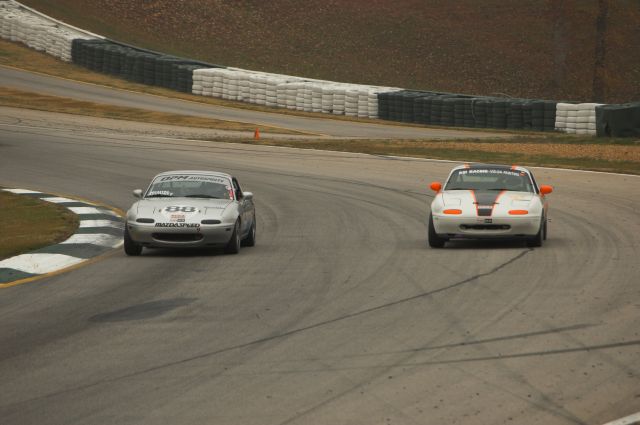
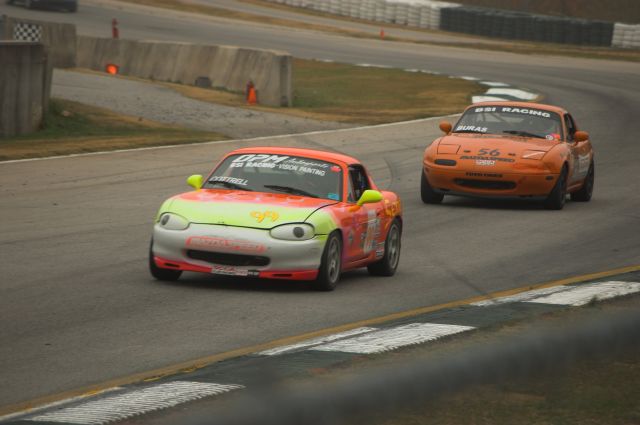
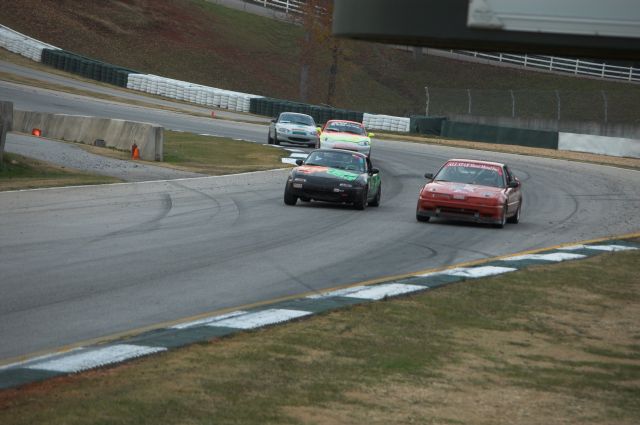
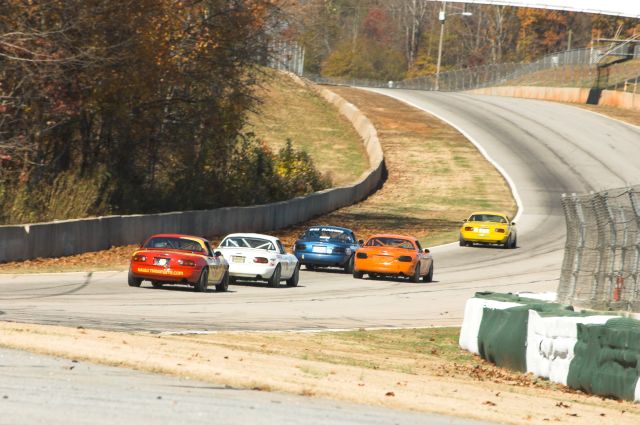
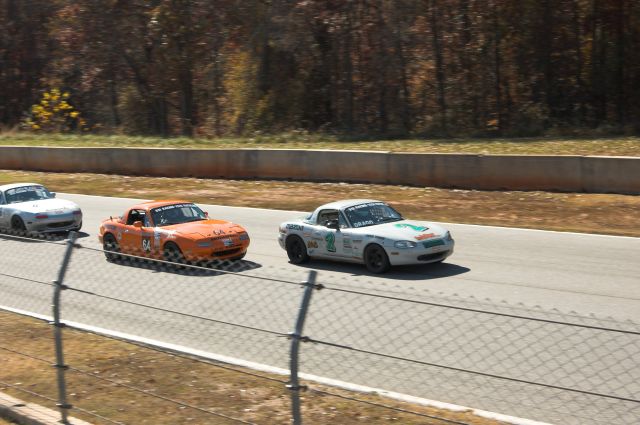
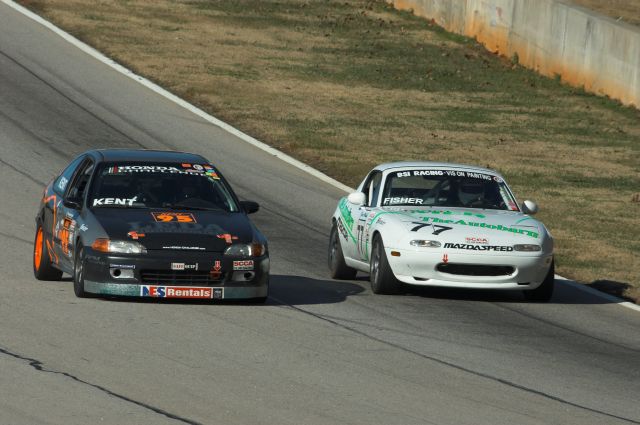
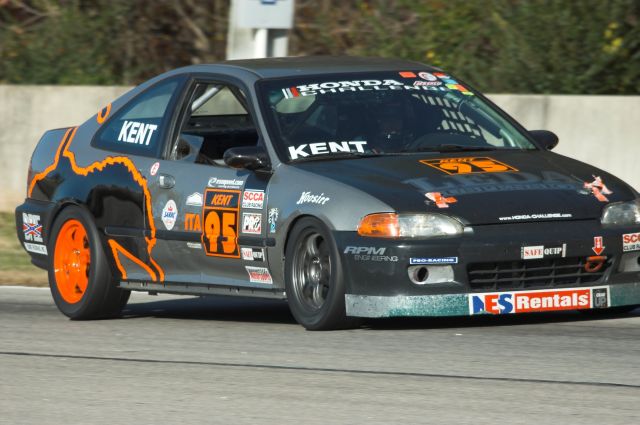
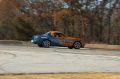
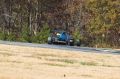
Lionel Kent's ITA #95 Honda Civic leads a small pack through Turn 12 during the Group 4 race |

|
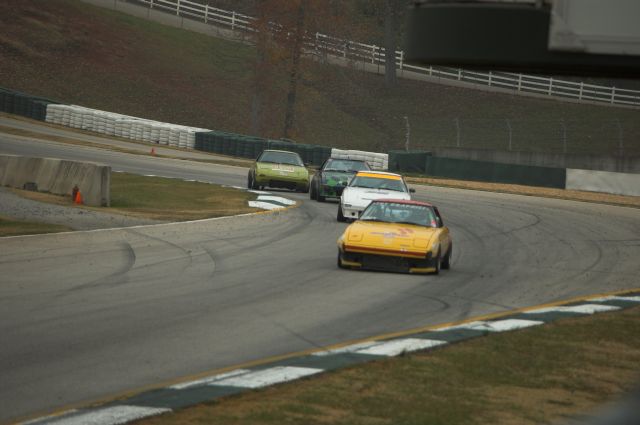
IMGP3086.jpg |
Nov 11 |
4 |
Race |
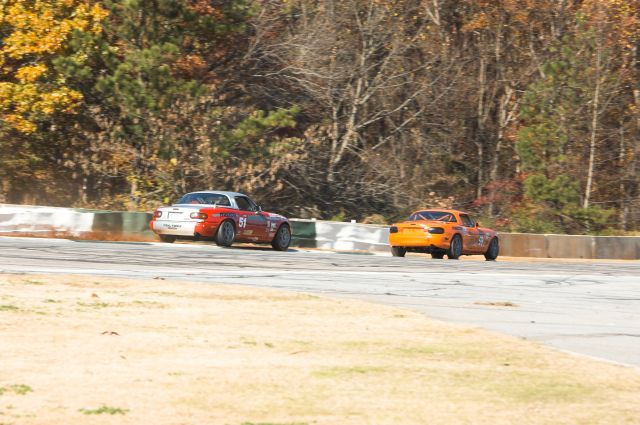
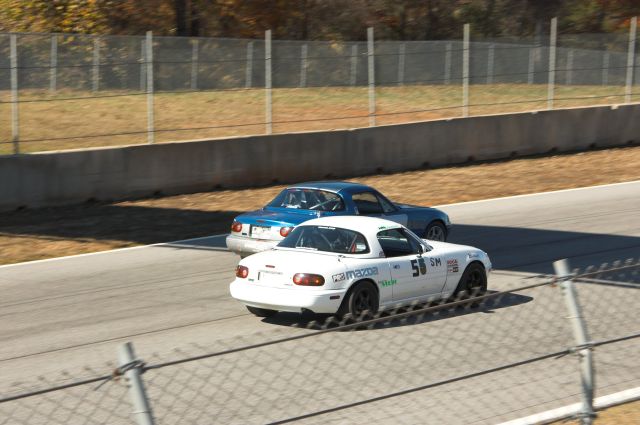
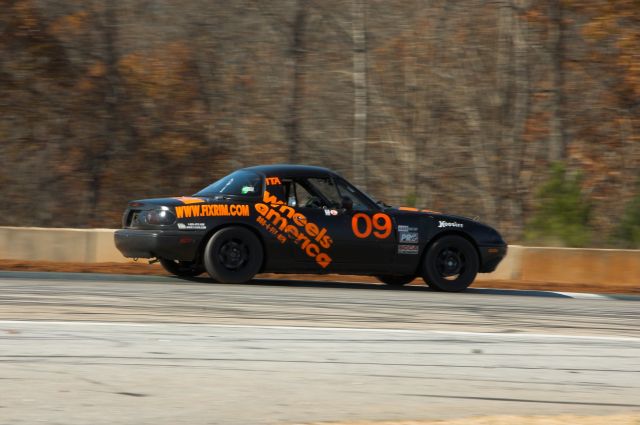
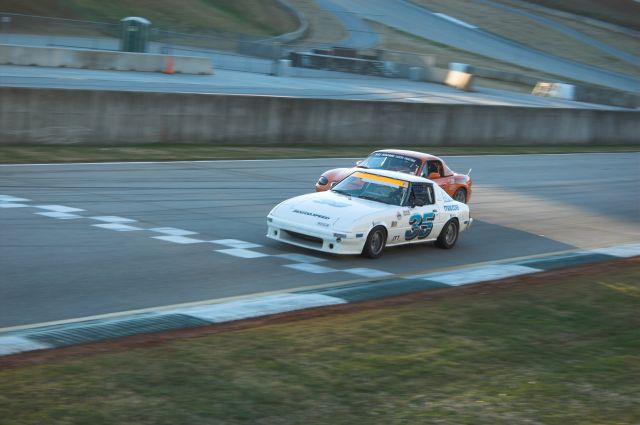
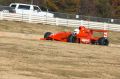
After travelling all the way from Shelbyville, IN, to run in the ARRC, Mark Frost's ITA #75 encountered a tire problem early in the Group 4 race and put him out after one complete lap |
|
IMGP3109.jpg |
Nov 11 |
4 |
Race |
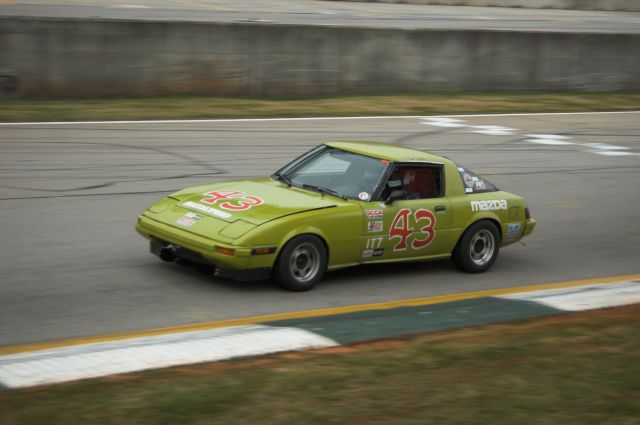
Tom Lyttle [IT7 #43] puts another lap in the books during the Group 4 ARRC race |
|
IMGP3110.jpg |
Nov 11 |
4 |
Race |
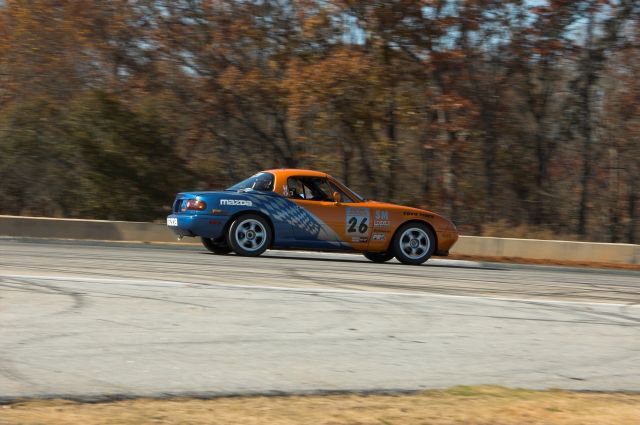
Attila Lukacs [IT7 #39] clicks off another lap during the Group 4 ARRC race |
|
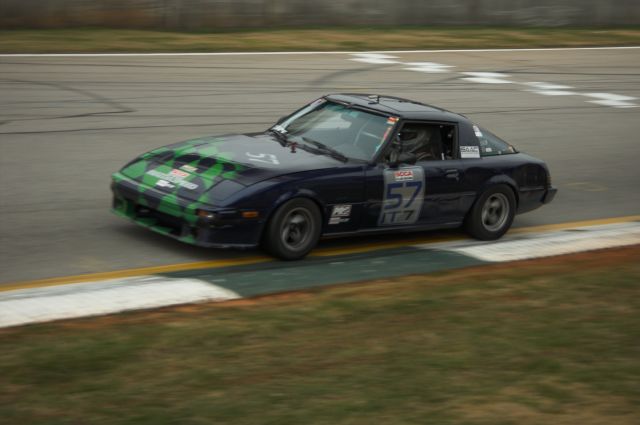
IMGP3115.jpg |
Nov 11 |
4 |
Race |
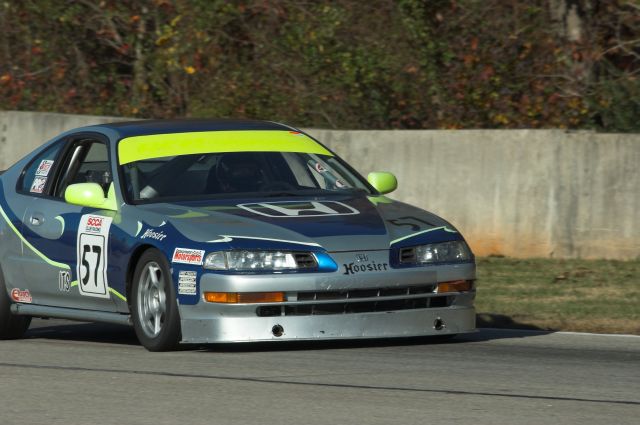
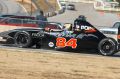
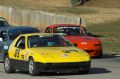
Eventual class-fifth-place finisher Jake Gulick [IT7 #57] wraps up one more lap in his pursuit of Bob Stretch [ITA #09] |
|
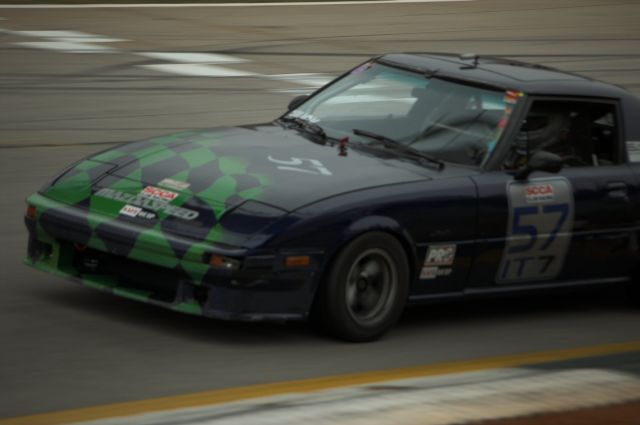
IMGP3116.jpg |
Nov 11 |
4 |
Race |
Eventual class-fifth-place finisher Jake Gulick [IT7 #57] wraps up one more lap in his pursuit of Bob Stretch [ITA #09] |
|
IMGP3117.jpg |
Nov 11 |
4 |
Race |
Race leader and eventual winner Greg Amy works his way through traffic on the front stretch late in the Group 4 ARRC race |
|
IMGP3118.jpg |
Nov 11 |
4 |
Race |
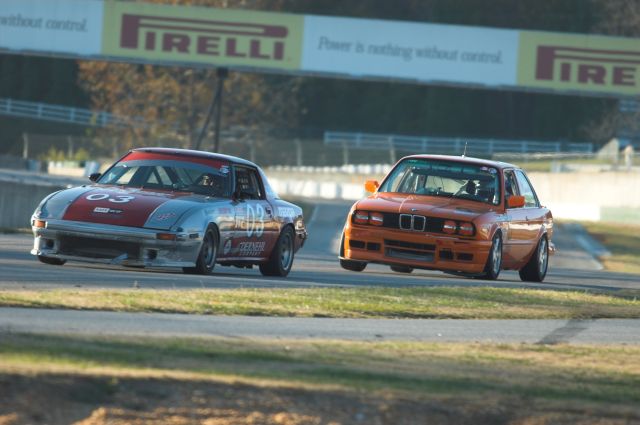
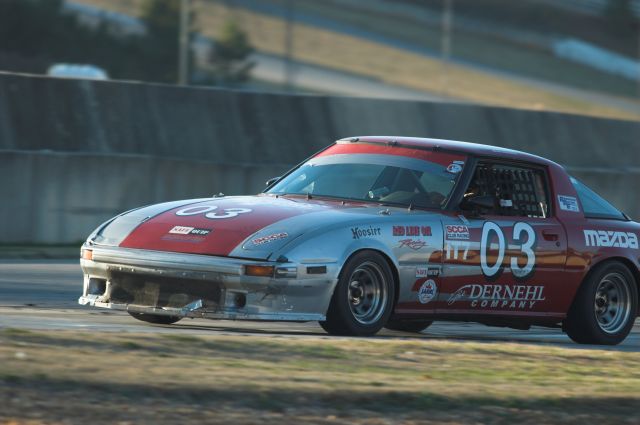
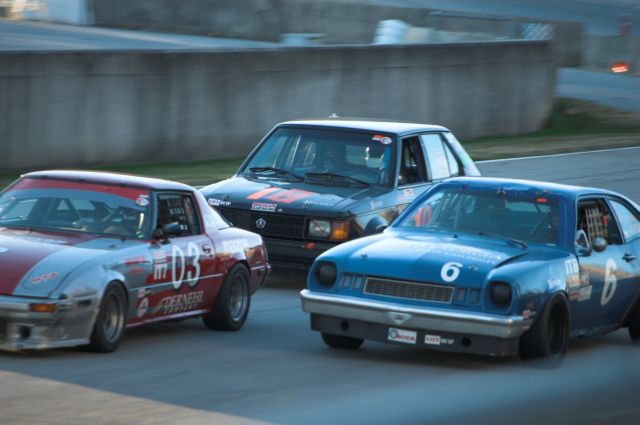
Atlanta's Sean Dernehl [IT7 #03] and Colin Harmer [ITA #42] battle it out on the front stratight during the Group 4 ARRC race |
|
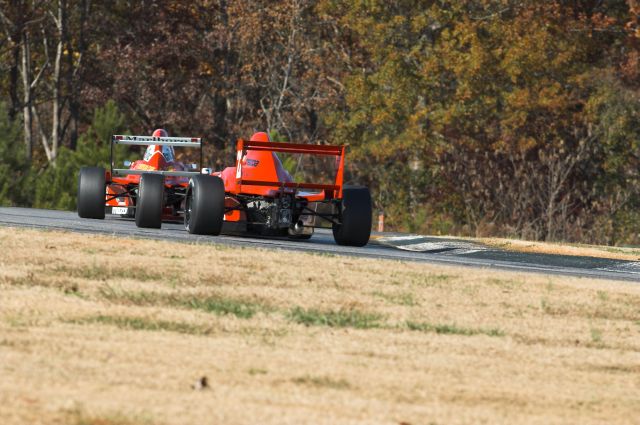
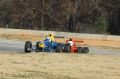
IMGP3119.jpg |
Nov 11 |
4 |
Race |
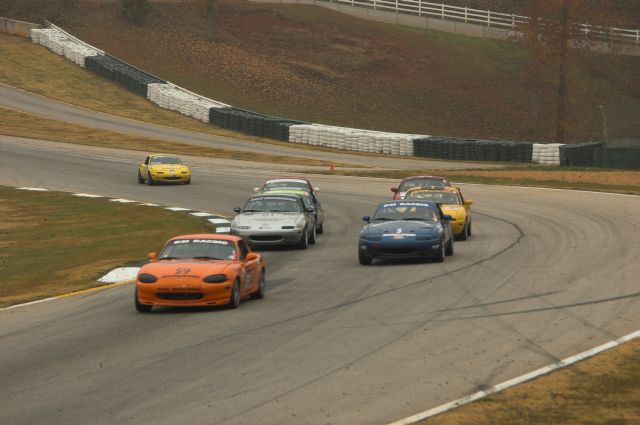
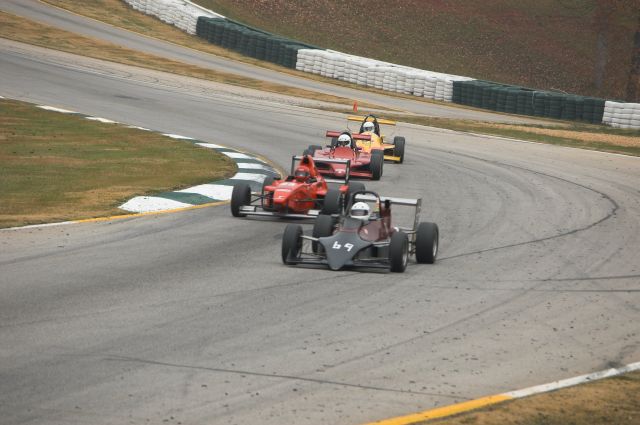
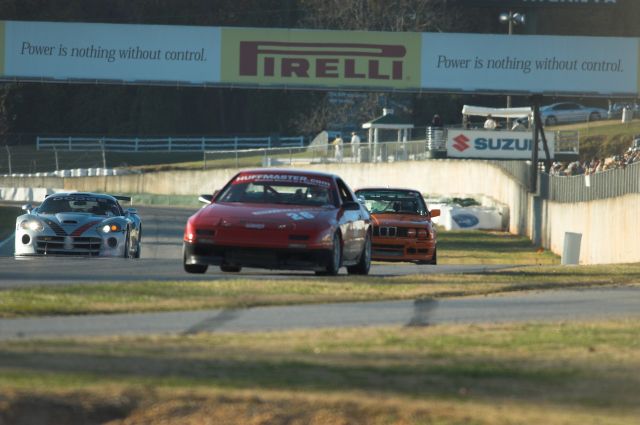
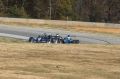
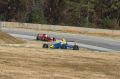
A big four-way battle among the IT7 class for finishing positions just off the podium in the Group 4 ARRC race |

|
IMGP3120.jpg |
Nov 11 |
4 |
Race |
Eventual class-fifth-place finisher Jake Gulick [IT7 #57] wraps up one more lap in his pursuit of Bob Stretch [ITA #09] |
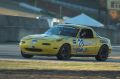
| Thumbnail |
Image Name |
Date |
Run Group |
Session |
Caption |
|
IMGP3210.jpg |
Nov 12 |
9 |
Race |
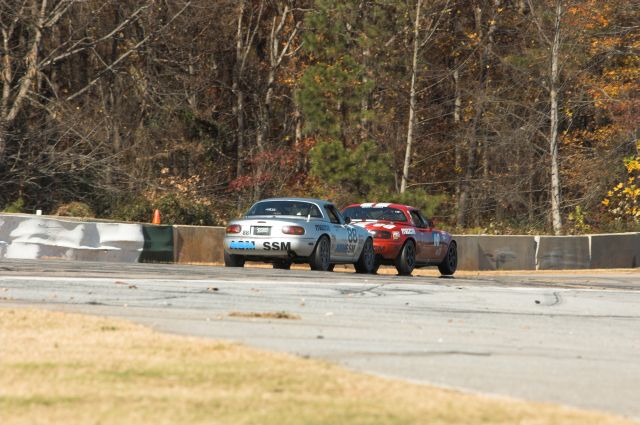
Colin Maclean [ASM #68] puts a move on Steve Devinney [SSM #88] going into Turn 7 and tries to get into position to pull Craig Heyl [ASM #00] out of the turn and onto the back straight |

|
IMGP3209.jpg |
Nov 12 |
9 |
Race |
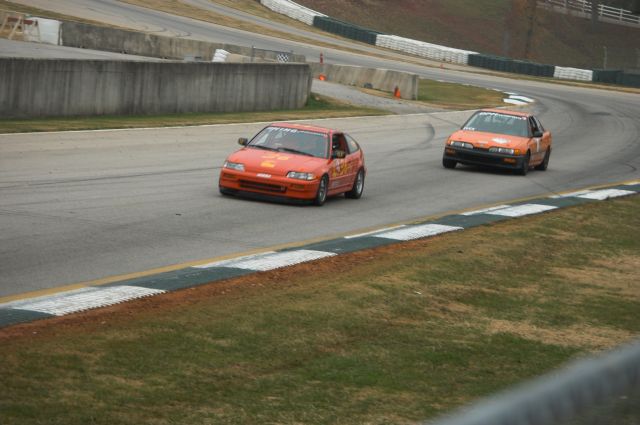
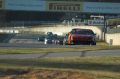
A three way battle in the middle of the pack during the Miata Madness race |
|
IMGP3208.jpg |
Nov 12 |
9 |
Race |
Robert Kim [ASM #26] heads into the apex of Turn 7 during the Miata Madness race |
|
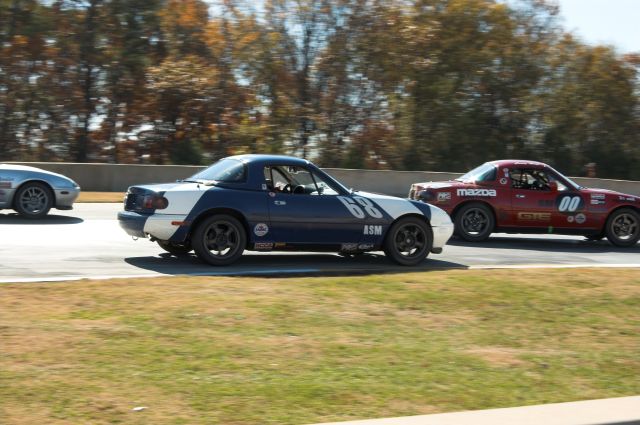
IMGP3206.jpg |
Nov 12 |
9 |
Race |
Derek Whitis [ASM #51] approaches the apex of Turn 7 during the Miata Madness race |

|
IMGP3205.jpg |
Nov 12 |
9 |
Race |
Michael Gatto [ASM #59] hits the apex at Turn 7 during the Miata Madness race |
|
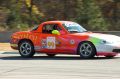
IMGP3203.jpg |
Nov 12 |
9 |
Race |
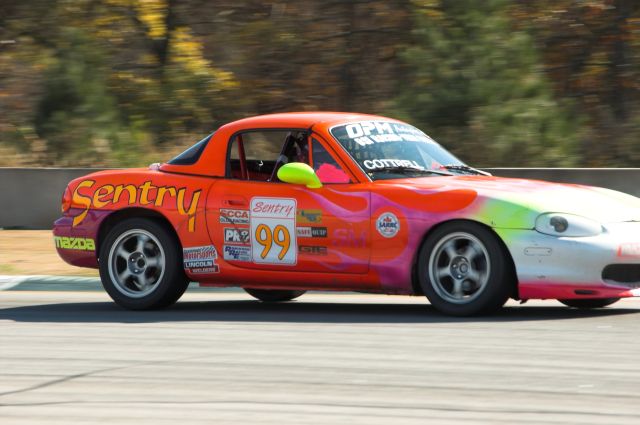
Michael Cottrell [ASM #99] in the braking zone for Turn 7 during the Miata Madness race |
|
IMGP3202.jpg |
Nov 12 |
9 |
Race |
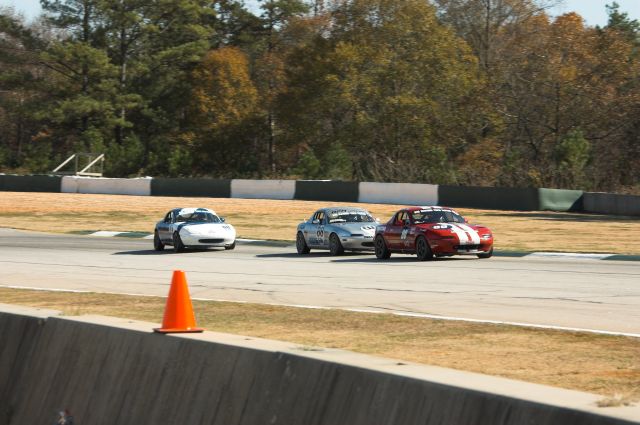
Bob Stretch [ITA #09] hits the apex of Turn 7 during the Miata Madness race as he chases the #74 ASM car of Pat Sandlin |
|
IMGP3200.jpg |
Nov 12 |
9 |
Race |
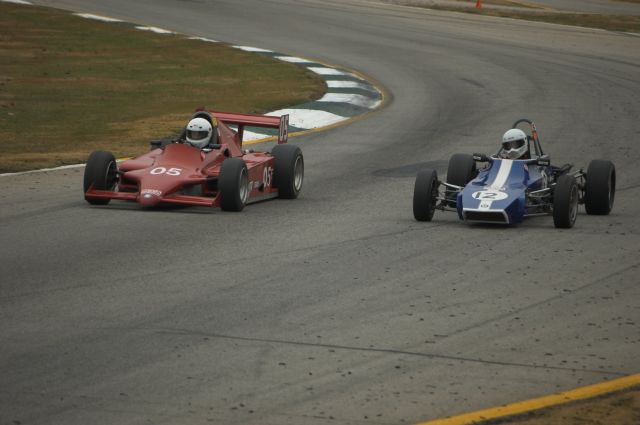
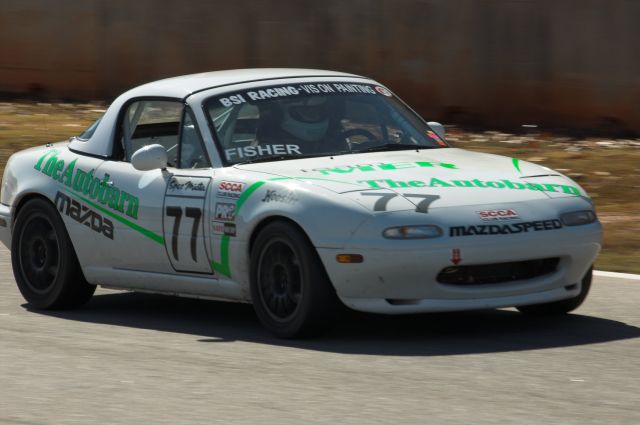
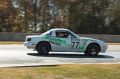
Richard Fisher [ASM #77] approaches the apex of Turn 7 during the Miata Madness race |

|
IMGP3199.jpg |
Nov 12 |
9 |
Race |
Dave Colledge [ASM #97] gets into Turn 7 a little too hard and locks up the right front wheel trying to get 'whoaed up' enough to make the turn |
|
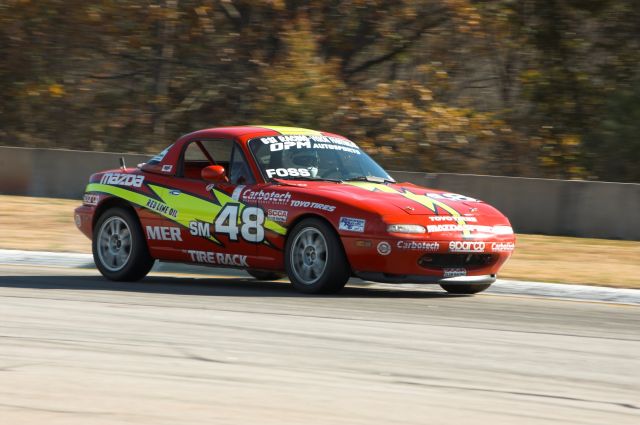
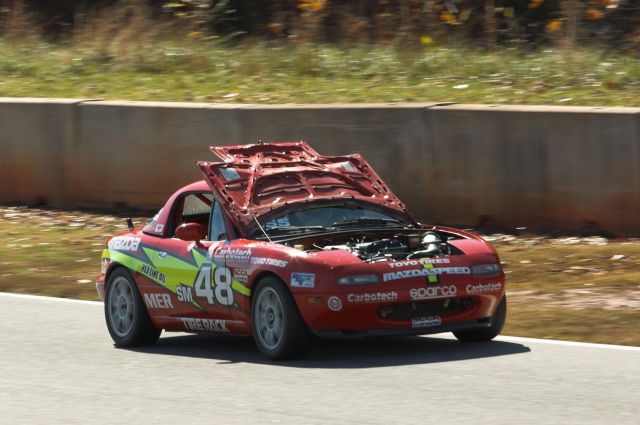
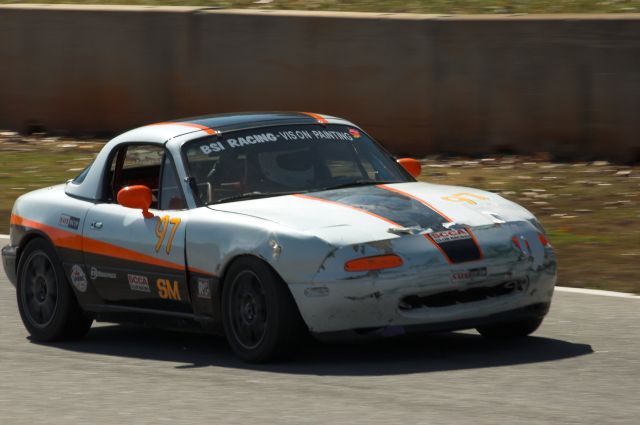
IMGP3198.jpg |
Nov 12 |
9 |
Race |
Recovering nicely from the "hood pins problem" on the first lap, Eric Foss [ASM #48] pushes hard between turns six and seven trying to make up for lost time in the Miata Madness race |
|
IMGP3197.jpg |
Nov 12 |
9 |
Race |
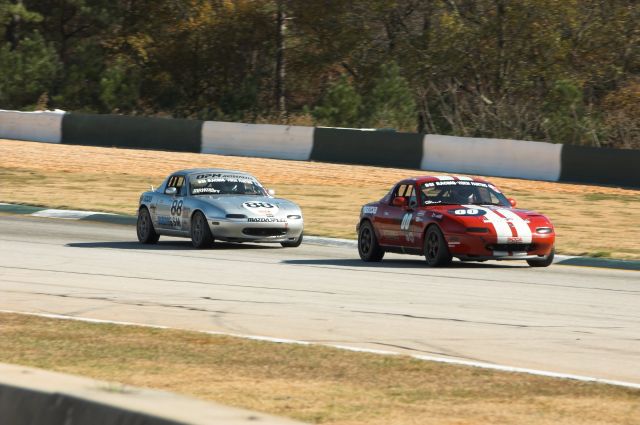
Craig Heyl [ASM #00] leads Steve Devinney [SSM #88] from Turn 6 to Turn 7 during the Miata Madness race |
|
IMGP3196.jpg |
Nov 12 |
9 |
Race |
Derek Whitis [ASM #51] leads Jason Sessions [ASM #16] from Turn 6 to Turn 7 during the Miata Madness race |
|
IMGP3195.jpg |
Nov 12 |
9 |
Race |
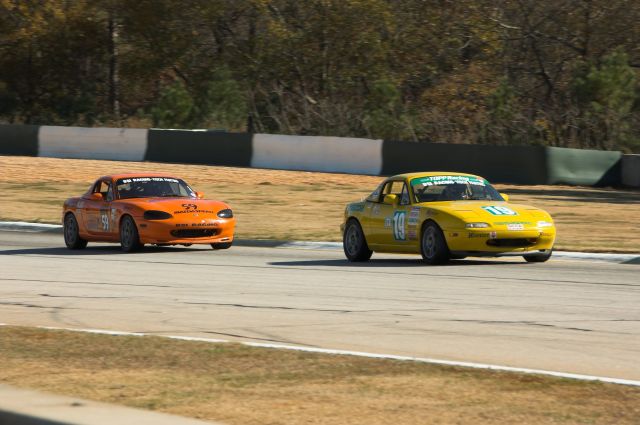
Mac Spikes [ITA #19] leads Michael Gatto [ASM #59] from Turn 6 to Turn 7 during the Miata Madness race |

|
IMGP3193.jpg |
Nov 12 |
9 |
Race |
Pat Sandlin [ASM #74] leads the field into Turn 7 during the Miata Madness race |

|
IMGP3211.jpg |
Nov 12 |
9 |
Race |
Colin Maclean [ASM #68] puts a move on Steve Devinney [SSM #88] going into Turn 7 and tries to get into position to pull Craig Heyl [ASM #00] out of the turn and onto the back straight |
|
IMGP3212.jpg |
Nov 12 |
9 |
Race |
Craig Heyl [ASM #00] leads Steve Devinney [SSM #88] down the back straight during the Miata Madness race |
|
IMGP3213.jpg |
Nov 12 |
9 |
Race |
Dave Colledge [ASM #97] climbs the curbing at Turn 7's track out to hold onto just a little more speed onto the back straight |

|
IMGP3217.jpg |
Nov 12 |
9 |
Race |
Richard Fisher [ASM #77] uses every bit of track short of the rumble strips as he leaves Turn 7 and heads down the back straight during the Miata Madness race |
|
IMGP3219.jpg |
Nov 12 |
9 |
Race |
Kevin Kopp [ASM #6] uses all of the track and half of the rumble strip tracking out from Turn 7 during the Miata Madness race |

|
IMGP3221.jpg |
Nov 12 |
9 |
Race |
A small pack exits Turn 7 and heads down the back straight during the Miata Madness race |
|
IMGP3222.jpg |
Nov 12 |
9 |
Race |
A small pack heads for Turn 8 during the Miata Madness race |
|
IMGP3223.jpg |
Nov 12 |
9 |
Race |
Robert Kim [ASM #26] leaves Turn 7 for the back straight during the Miata Madness race |
|
IMGP3224.jpg |
Nov 12 |
9 |
Race |
Mac Spikes [ITA #19] uses the rumble strips to make the exit of Turn 7 just a little bit wider during the Miata Madness race |
|
IMGP3225.jpg |
Nov 12 |
9 |
Race |
Derek Whitis [ASM #51] uses all of the track, and some of the terrain, exiting Turn 7 in his battle with Michael Gatto [ASM #59] during the Miata Madness race |

|
IMGP3230.jpg |
Nov 12 |
9 |
Race |
Michael Cottrell [ASM #99] takes a cool down lap after the Miata Madness race |
|
IMGP3231.jpg |
Nov 12 |
9 |
Race |
Michael Cottrell [ASM #99] takes a cool down lap after the Miata Madness race |
|
IMGP3232.jpg |
Nov 12 |
9 |
Race |
Michael Cottrell [ASM #99] takes a cool down lap after the Miata Madness race while spectators and the Turn 7 flag station crew look on |
|
IMGP3233.jpg |
Nov 12 |
9 |
Race |
Michael Cottrell [ASM #99] takes a cool down lap after the Miata Madness race |
|
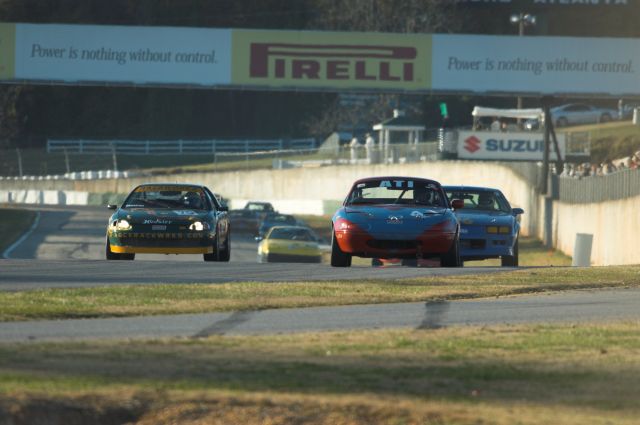
IMGP3162.jpg |
Nov 12 |
9 |
Race |
Oops! Apparently someone on Eric Foss' [ASM #48] team forgot the hood pins before the Miata Madness Group 9 ARRC race. He managed to see well enough to get back to the pits and ended up finishing seventh overall and fifth in the ASM class |

|
IMGP3163.jpg |
Nov 12 |
9 |
Race |
Steven Devinney [SSM #88] rushes past the flag station at Turn 8 during the Miata Madness Group 9 race |
|
IMGP3164.jpg |
Nov 12 |
9 |
Race |
Part of the Miata Madness field scampers onto the back straight from Turn 7 |
|
IMGP3165.jpg |
Nov 12 |
9 |
Race |
Part of the Miata Madness field scampers onto the back straight from Turn 7 |
|
IMGP3166.jpg |
Nov 12 |
9 |
Race |
Dave Colledge [ASM #97] rushes past the flag station at Turn 8 during the Miata Madness race |
|
IMGP3167.jpg |
Nov 12 |
9 |
Race |
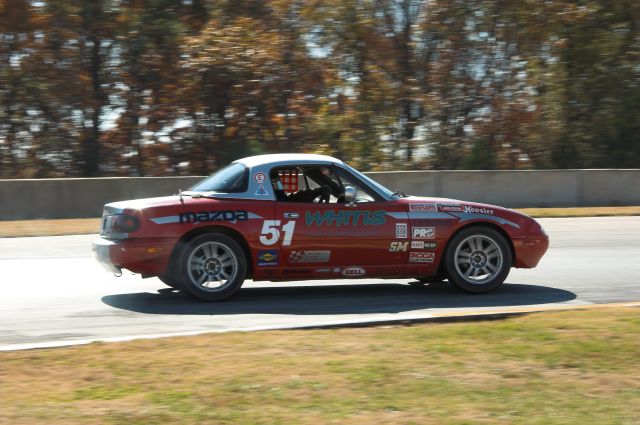
Richard Fisher [ASM #77] races down the back straight during the Miata Madness race |
|
IMGP3169.jpg |
Nov 12 |
9 |
Race |
Todd Buras [ASM #56] leads Michael Cottrell [ASM #99] down the back straight during the Miata Madness race |
|
IMGP3171.jpg |
Nov 12 |
9 |
Race |
Robert Kollar [ASM #64] and Kevin Kopp [ASM #6] battle down the back straight during the Miata Madness race |
|
IMGP3172.jpg |
Nov 12 |
9 |
Race |
Robert Kim makes another pass down the back straight on his way to a ninth-place overall finish in the Miata Madness race |
|
IMGP3173.jpg |
Nov 12 |
9 |
Race |
Dick Makow [ASM #31] and Julia Dawson [ASM #55] continue their battle for another run down the back straight during the Miata Madness race |
|
IMGP3174.jpg |
Nov 12 |
9 |
Race |
Dick Makow [ASM #31] and Julia Dawson [ASM #55] continue their battle for another run down the back straight during the Miata Madness race |
|
IMGP3175.jpg |
Nov 12 |
9 |
Race |
Eric Foss [ASM #48] has corrected the missing hood pins problem and continued in the Miata Madness race |
|
IMGP3176.jpg |
Nov 12 |
9 |
Race |
Pat Sandlin [ASM #74] and Bob Stretch [ITA #09] battled furiously for almost the entire Miata Madness race, with Sandlin eventually taking the win |
|
IMGP3177.jpg |
Nov 12 |
9 |
Race |
Robert Kollar [ASM #64] and Kevin Kopp [ASM #6] battle for position as they catch lapped traffic in the person of Jim Drago [ASM #2] |
|
IMGP3192.jpg |
Nov 12 |
9 |
Race |
Craig Heyl [ASM #00] leads Steve Devinney [SSM #88] out of Turn 7 and onto the back straight during the Miata Madness race |
|
IMGP3191.jpg |
Nov 12 |
9 |
Race |
Robert Kim [ASM #26] heads out of Turn 7 and onto the back straight during the Miata Madness race |
|
IMGP3190.jpg |
Nov 12 |
9 |
Race |
Derek Whitis [ASM #51] leads Jason Sessions [ASM #16] out of Turn 7 and onto the back straight during the Miata Madness race |
|
IMGP3189.jpg |
Nov 12 |
9 |
Race |
Todd Buras [ASM #56] leads Michael Gatto [ASM #59] out of Turn 7 and onto the back straight during the Miata Madness race |
|
IMGP3188.jpg |
Nov 12 |
9 |
Race |
Michale Cottrell [ASM #99] leads Robert Kollar [ASM #64] out of Turn 7 and onto the back straight during the Miata Madness race |
|
IMGP3187.jpg |
Nov 12 |
9 |
Race |
Michale Cottrell [ASM #99] leads Robert Kollar [ASM #64] out of Turn 7 and onto the back straight during the Miata Madness race |
|
IMGP3186.jpg |
Nov 12 |
9 |
Race |
Bob Stretch [ITA #09] chases the ASM #74 of Pat Sandlin onto the back stretch as they fight for the win in the Miata Madness race |
|
IMGP3185.jpg |
Nov 12 |
9 |
Race |
Pat Sandlin [ASM #74] leads the pack out of Turn 7 and onto the back stretch during the Miata Madness race |

|
IMGP3183.jpg |
Nov 12 |
9 |
Race |
Eric Foss [ASM #48] races past the Turn 8 flag station during the Miata Madness race |

|
IMGP3182.jpg |
Nov 12 |
9 |
Race |
Dick Makow [ASM #31] races past the Turn 8 flag station during the Miata Madness race |

|
IMGP3181.jpg |
Nov 12 |
9 |
Race |
Another lap in the hard fought battle between Pat Sandlin [ASM #74] and Bob Stretch [ITA #09] for the win in the Miata Madness race |
|
IMGP3180.jpg |
Nov 12 |
9 |
Race |
Craig Heyl [ASM #00] makes another pass of the back straight during the Miata Madness race |

|
IMGP3179.jpg |
Nov 12 |
9 |
Race |
Jason Sessions [ASM #16] passes Derek Whitis [ASM #51] on the back straight during the Miata Madness race |

|
IMGP3178.jpg |
Nov 12 |
9 |
Race |
Jason Sessions [ASM #16] passes Derek Whitis [ASM #51] on the back straight during the Miata Madness race |
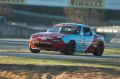
| Thumbnail |
Image Name |
Date |
Run Group |
Session |
Caption |
|
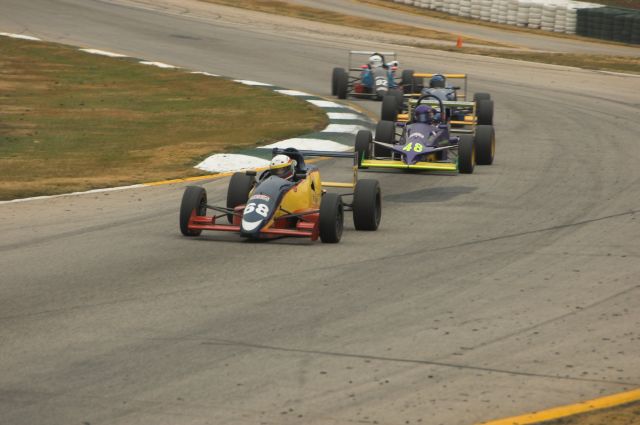
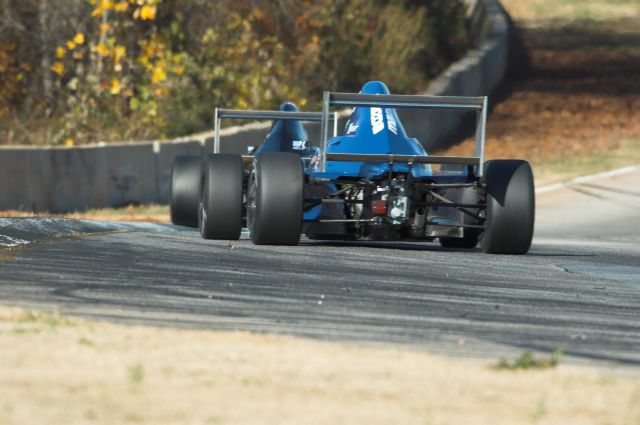
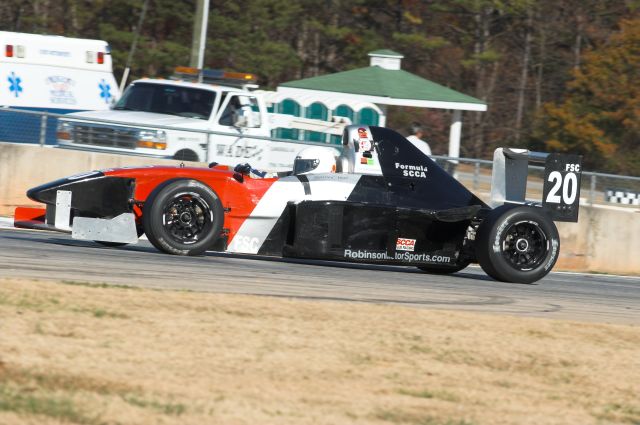
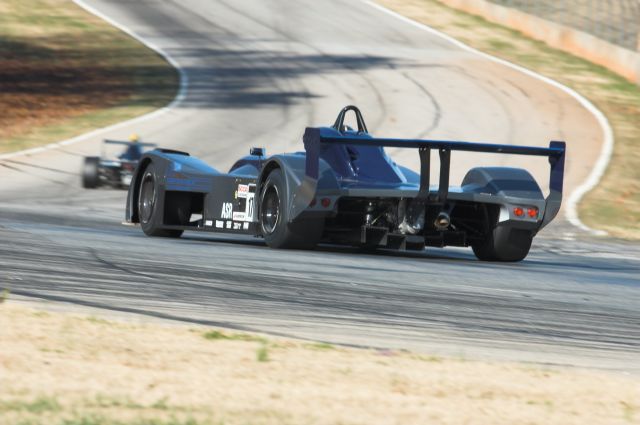
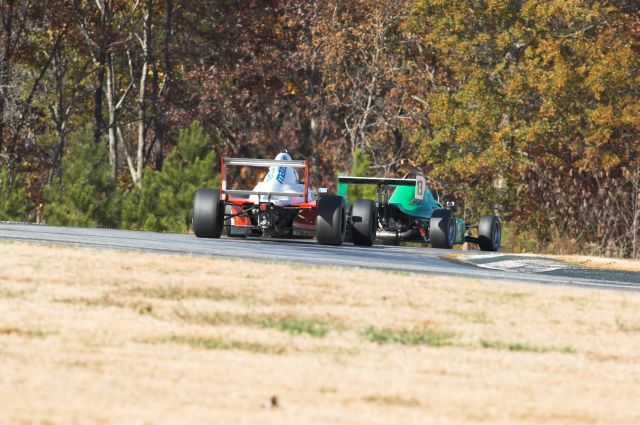
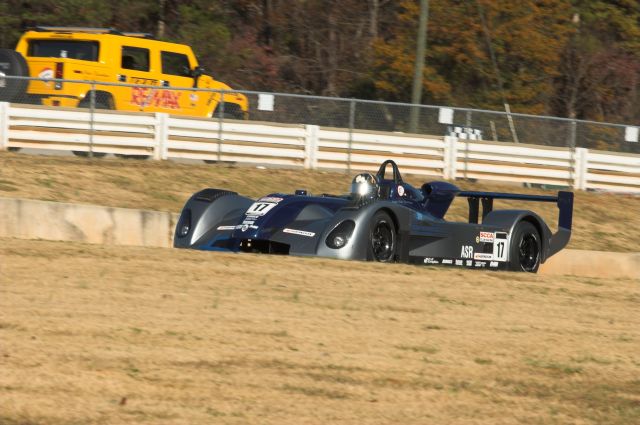
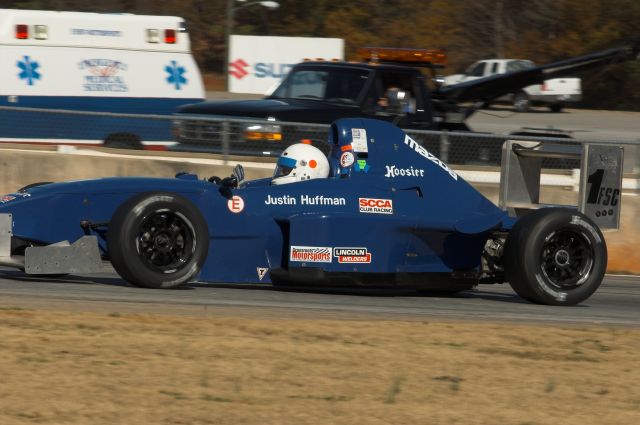
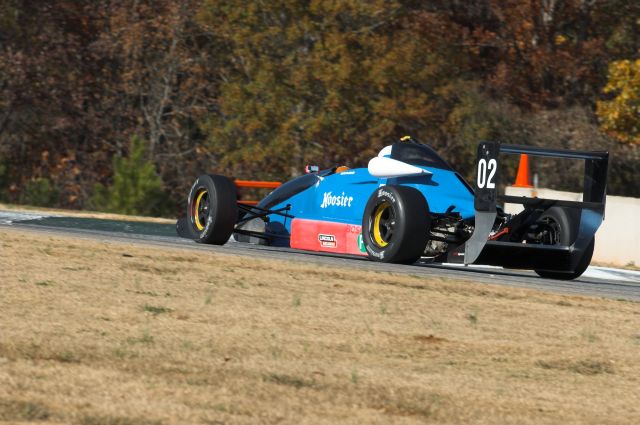
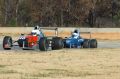
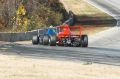
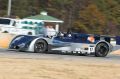
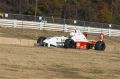
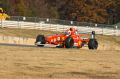
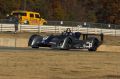
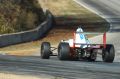
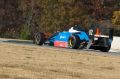
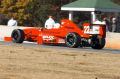
IMGP3317.jpg |
Nov 12 |
10 |
Race |
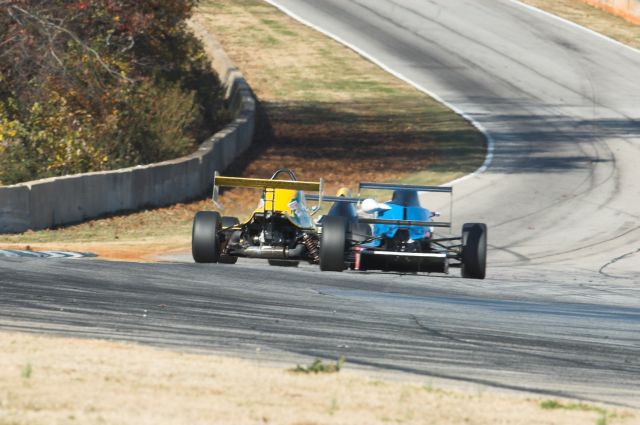
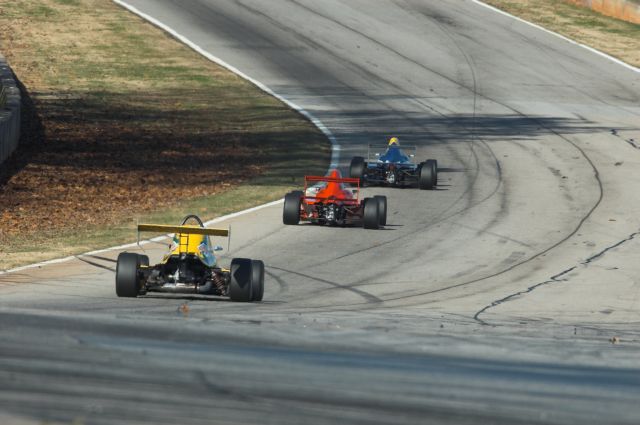
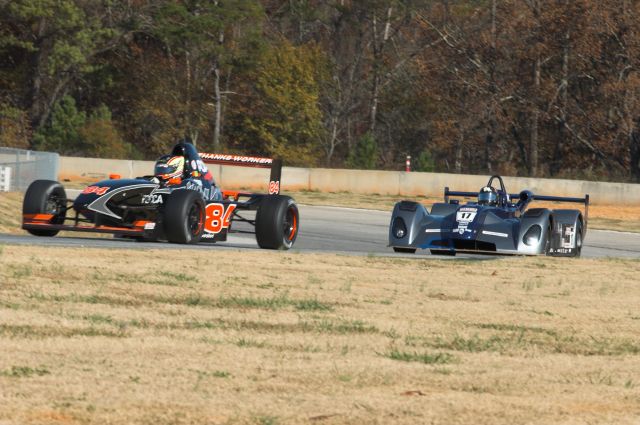
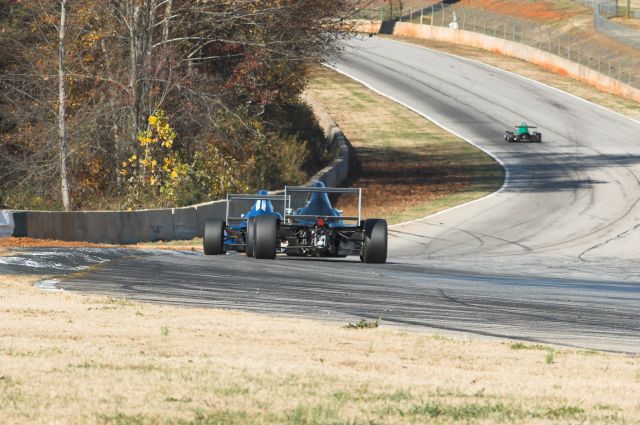
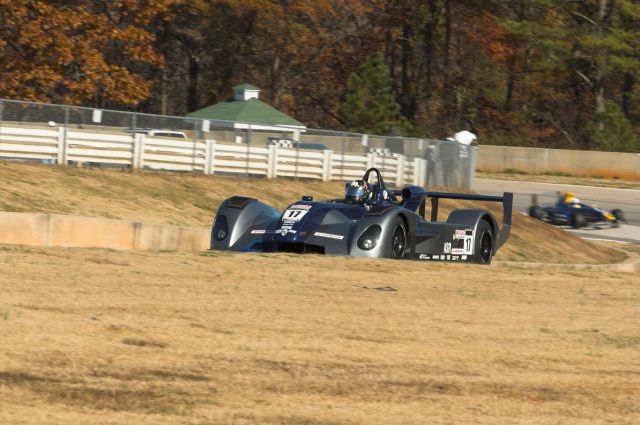
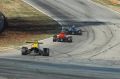
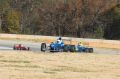
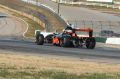
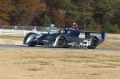
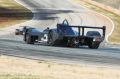
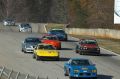
Three way formula car battle heading into the back straight during the Pro Shootout race |
|
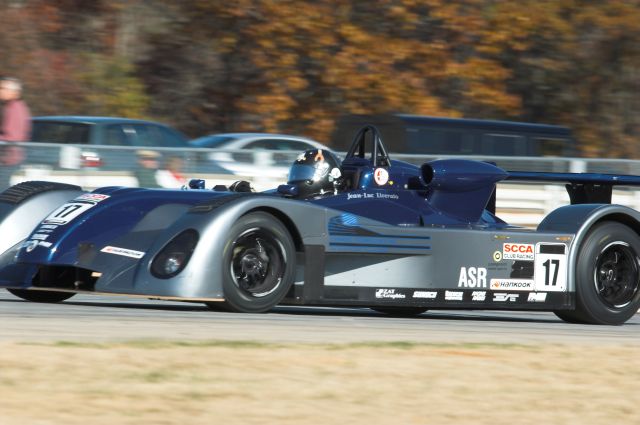
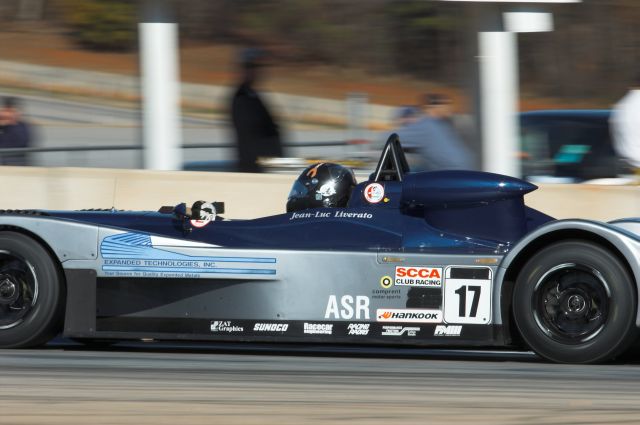
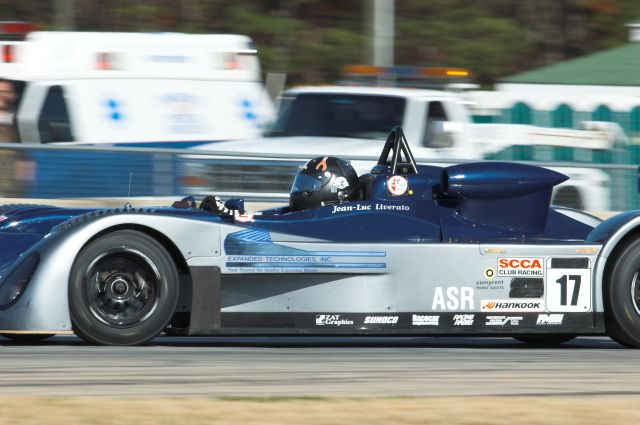
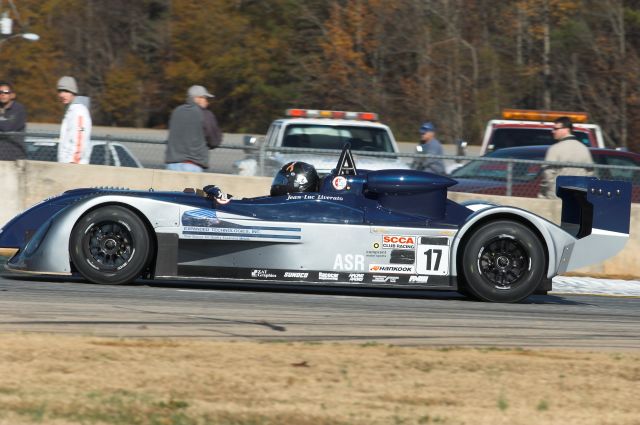
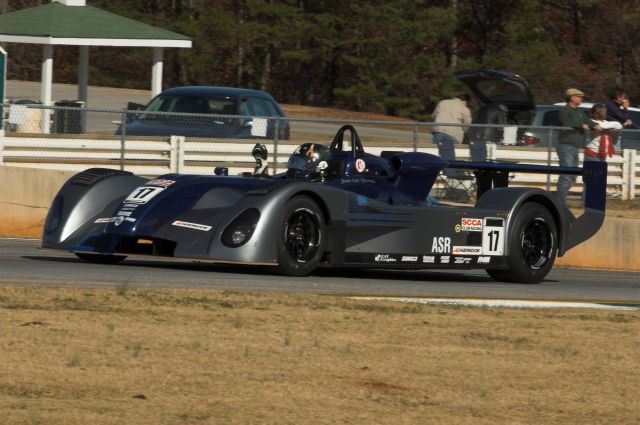
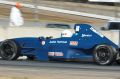
IMGP3318.jpg |
Nov 12 |
10 |
Race |
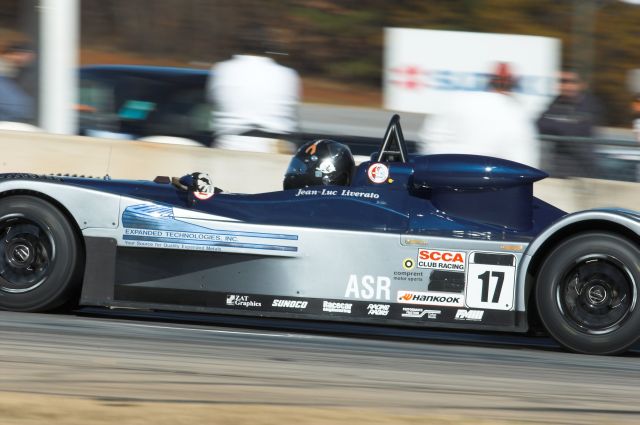
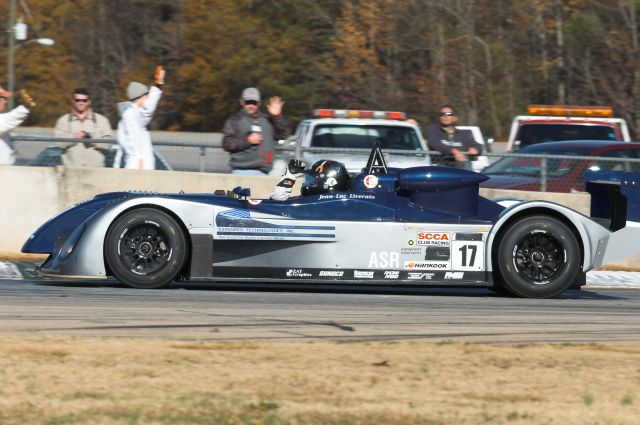
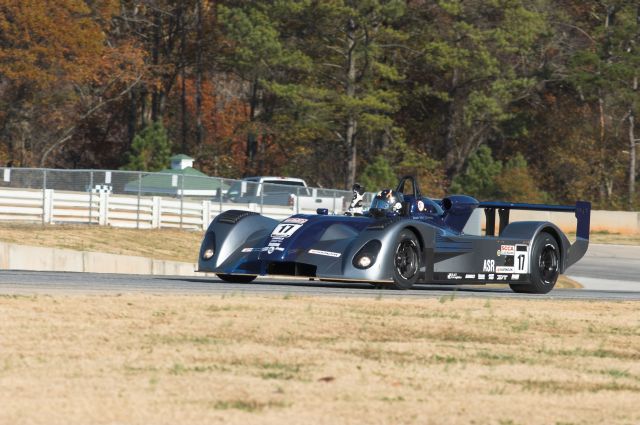
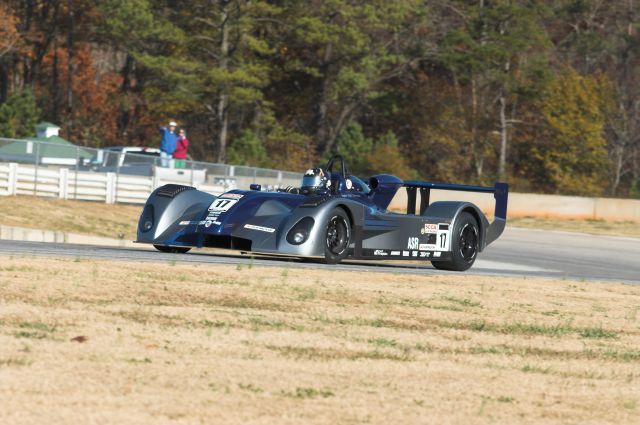
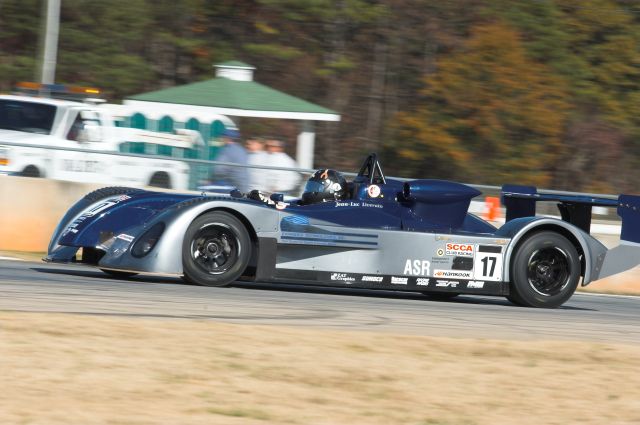
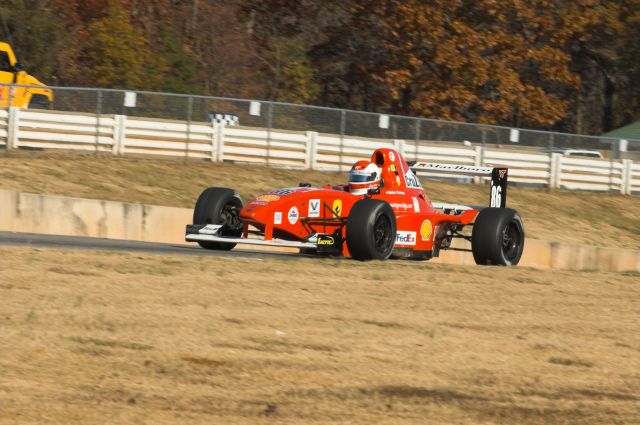
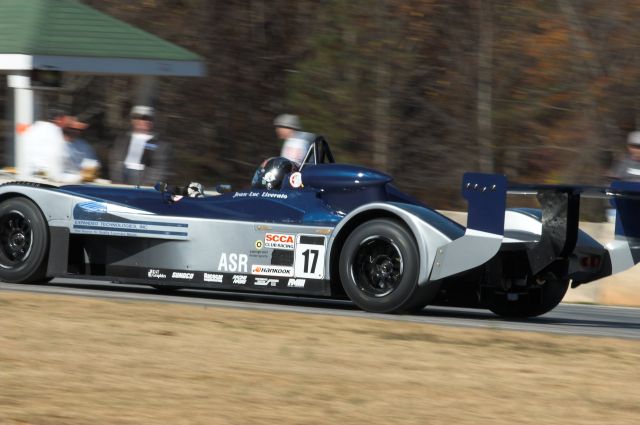
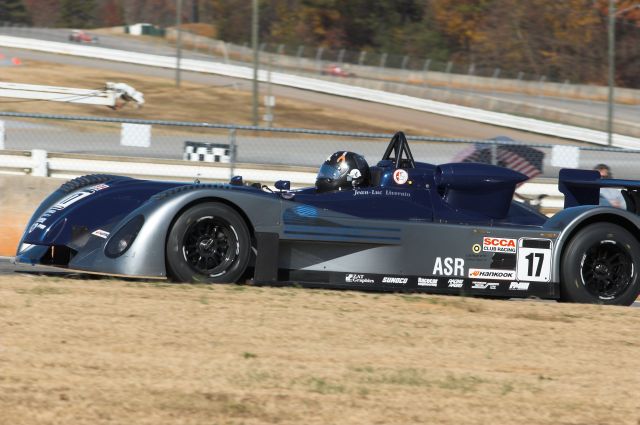
Jean-Luc Liverato [ASR #17] cruises from Turn 6 to Turn 7 after pulling out a bit of lead over second place during the Pro Shootout race |
|
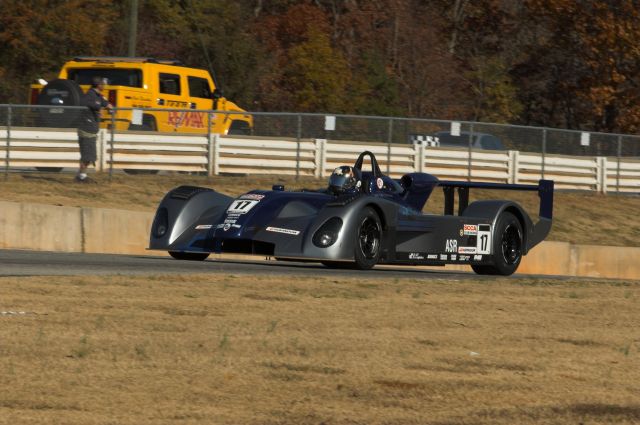
IMGP3319.jpg |
Nov 12 |
10 |
Race |
Jean-Luc Liverato [ASR #17] hits the apex at Turn 7 while leading the Pro Shootout race |
|
IMGP3321.jpg |
Nov 12 |
10 |
Race |
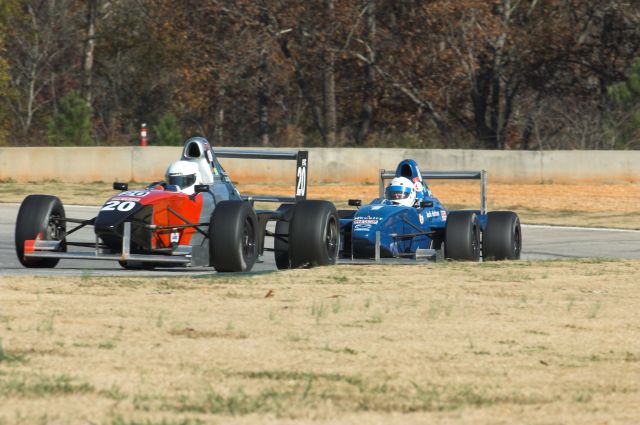
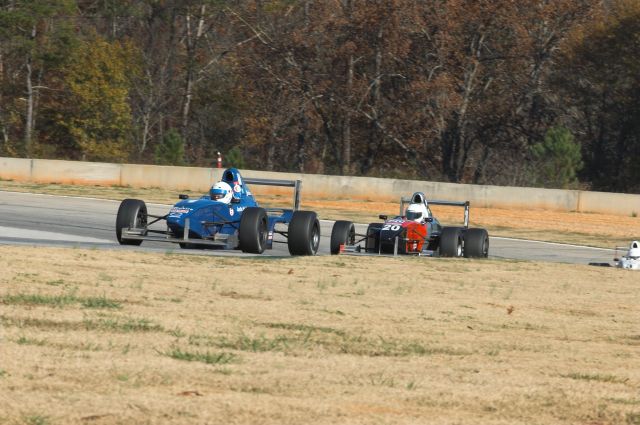
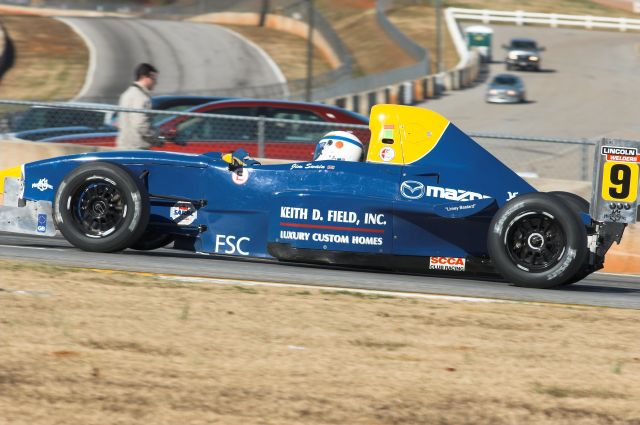
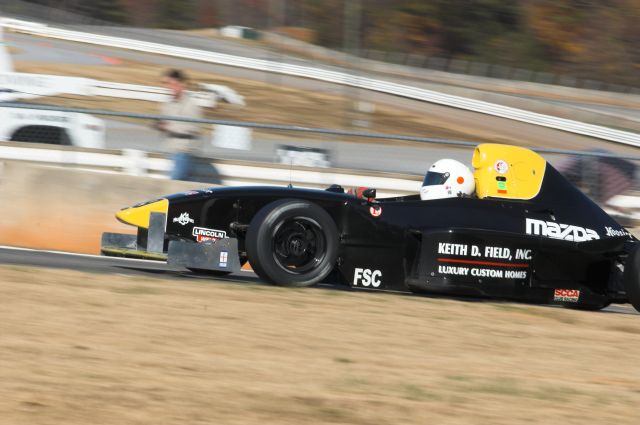
Matthew Inge [FSC #20] and Justin Huffman [FSC #1] battle for class lead between turns six and seven during the Pro Shootout race |
|
IMGP3322.jpg |
Nov 12 |
10 |
Race |
Justin Huffman [FSC #1] tries to make time through Turn 7 in his battle with Matthew Inge [FSC #20] for the class win |
|
IMGP3323.jpg |
Nov 12 |
10 |
Race |
Justin Huffman [FSC #1] chases Matthew Inge [FSC #20] out of Turn 7 and onto the back straight in their battle for the class lead during the Pro Shootout race |

|
IMGP3324.jpg |
Nov 12 |
10 |
Race |
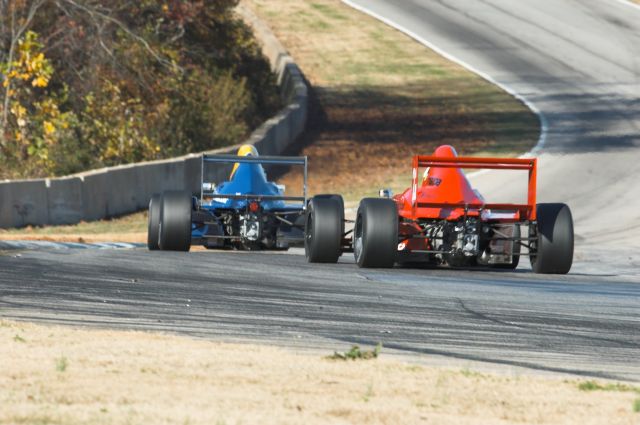
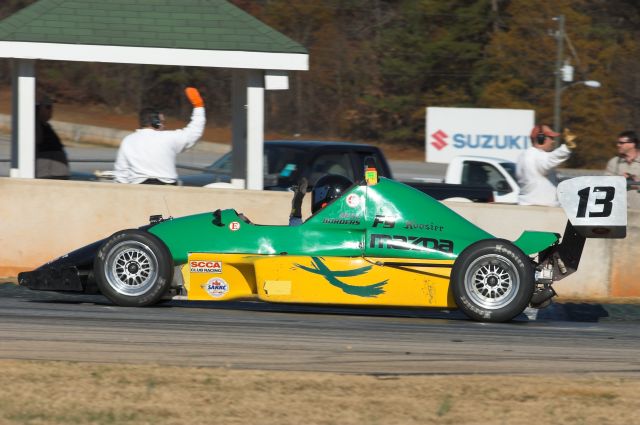
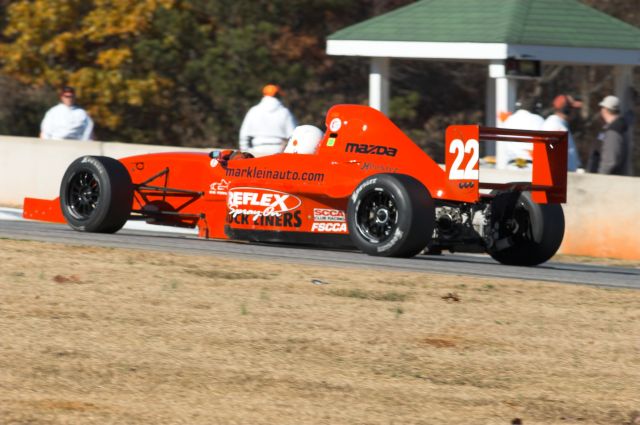
Jim Swain [FSC #9] and Dennis Marklein [FSC #22] battled throughout the Pro Shootout race |

|
IMGP3325.jpg |
Nov 12 |
10 |
Race |
Jim Swain [FSC #9] and Dennis Marklein [FSC #22] battled throughout the Pro Shootout race |

|
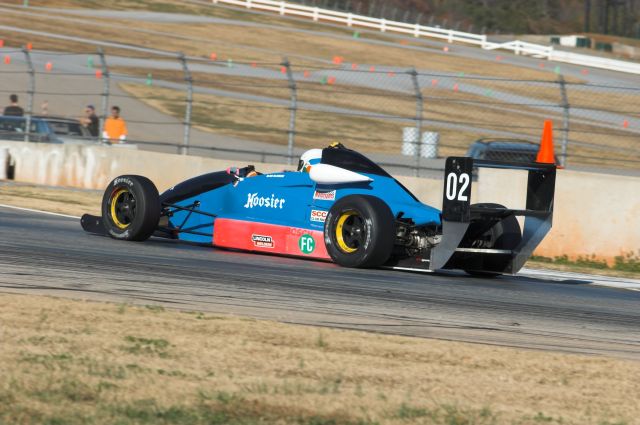
IMGP3327.jpg |
Nov 12 |
10 |
Race |
Russ McBride [CFC #02] heads for the apex at Turn 7 during the Pro Shootout race |

|
IMGP3328.jpg |
Nov 12 |
10 |
Race |
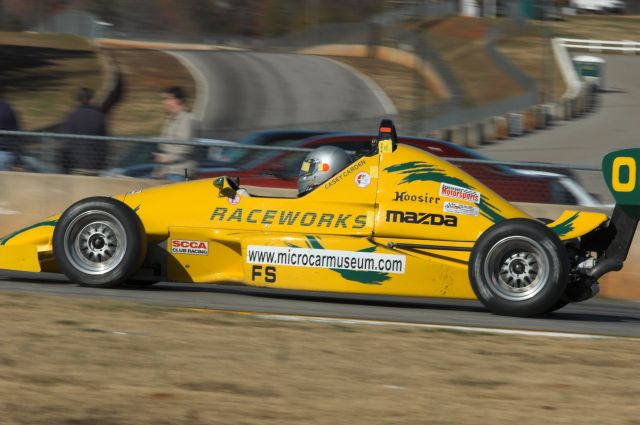
Casey Carden [FS #06] breaks for the apex of Turn 7 during the Pro Shootout race |
|
IMGP3329.jpg |
Nov 12 |
10 |
Race |
Jean-Luc Liverato [ASR #17] attacks Turn 7 during the Pro Shootout race |
|
IMGP3331.jpg |
Nov 12 |
10 |
Race |
Two Formula SCCA racers take their battle through Turn 7 and onto the back straight during the Pro Shootout race |
|
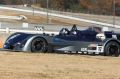
IMGP3316.jpg |
Nov 12 |
10 |
Race |
Jim Swain [FSC #9] and Dennis Marklein [FSC #22] battle their way out of Turn 7 and onto the back straight during the Pro Shootout race |

|
IMGP3315.jpg |
Nov 12 |
10 |
Race |
Jim Swain [FSC #9] and Dennis Marklein [FSC #22] battle their way from Turn 6 to seven during the Pro Shootout race |
|
IMGP3314.jpg |
Nov 12 |
10 |
Race |
Jim Swain [FSC #9] and Dennis Marklein [FSC #22] battle their way from Turn 6 to seven during the Pro Shootout race |
|
IMGP3313.jpg |
Nov 12 |
10 |
Race |
Jean-Luc Liverato [ASR #17] turns hard right while going through Turn 7 during the Pro Shootout |
|
IMGP3312.jpg |
Nov 12 |
10 |
Race |
Jean-Luc Liverato [ASR #17] turns hard right while going through Turn 7 during the Pro Shootout |
|
IMGP3311.jpg |
Nov 12 |
10 |
Race |
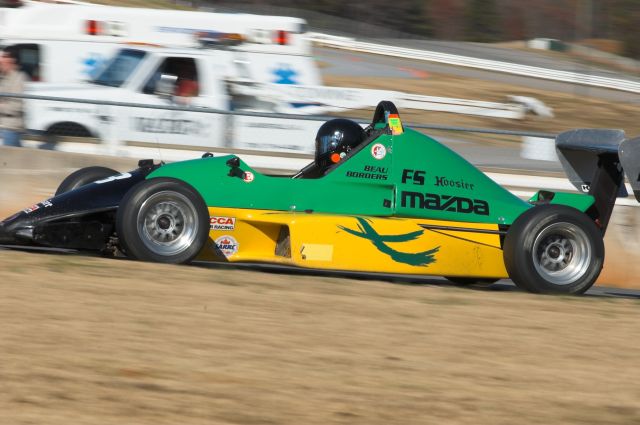
Beau Borders [FS #13] hits the apex at Turn 7 during the Pro Shootout race |
|
IMGP3310.jpg |
Nov 12 |
10 |
Race |
Russ McBride [CFC #02] hits the apex at Turn 7 during the Pro Shootout race |
|
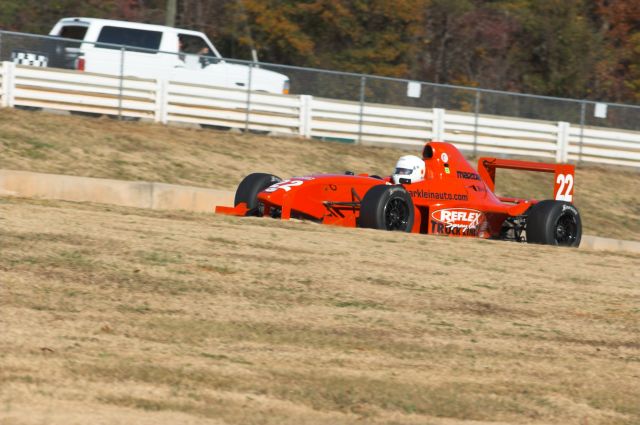
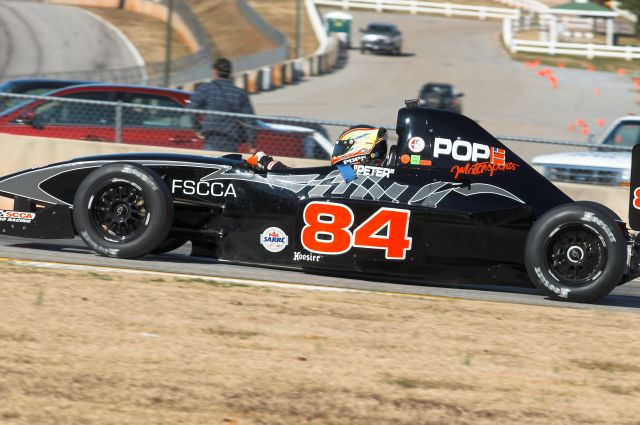
IMGP3309.jpg |
Nov 12 |
10 |
Race |
Peter Pope [FSC #84] heads for the apex of Turn 7 during the Pro Shootout race |

|
IMGP3308.jpg |
Nov 12 |
10 |
Race |
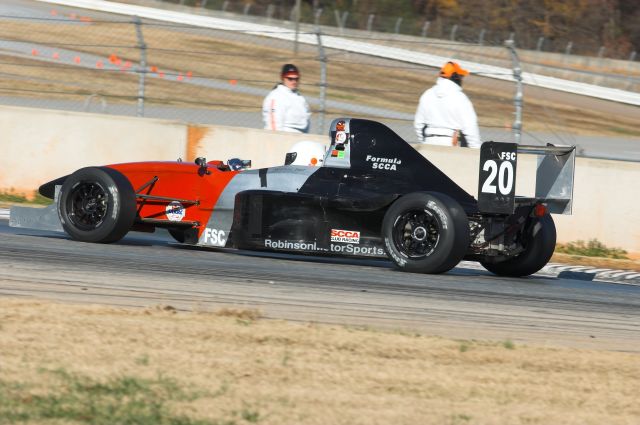
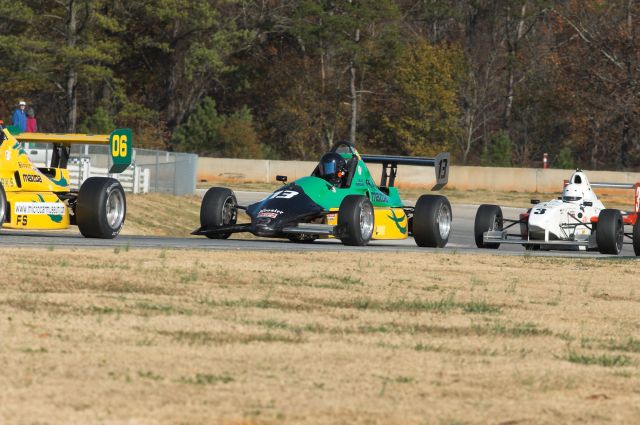
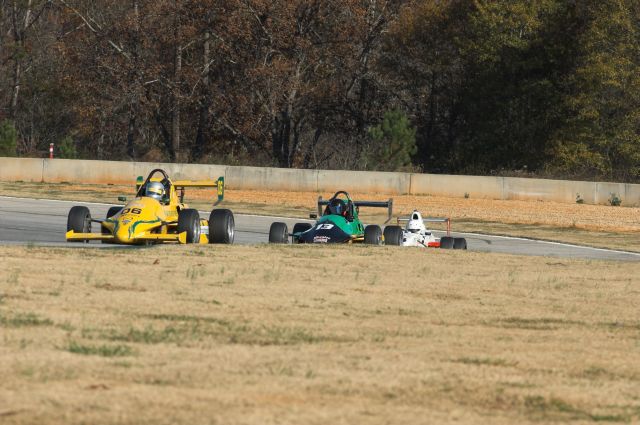
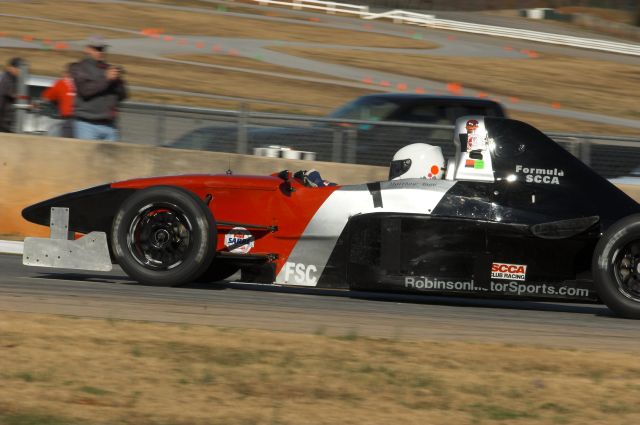
Part of the Formula SCCA battle in the Pro Shootout race moves past Turn 7 and into the "unlimited speed zone" of the back straight |

|
IMGP3306.jpg |
Nov 12 |
10 |
Race |
Part of the Formula SCCA battle in the Pro Shootout race moves past Turn 7 and into the "unlimited speed zone" of the back straight |

|
IMGP3305.jpg |
Nov 12 |
10 |
Race |
Jean-Luc Liverato [ASR #17] uses all of the rumble strip at Turn 7's track out during the Pro Shootout race |

|
IMGP3303.jpg |
Nov 12 |
10 |
Race |
Beau Borders [FS #13] leaves Turn 7 and heads onto the back straight during the Pro Shootout race |
|
IMGP3302.jpg |
Nov 12 |
10 |
Race |
The Formula SCCA battle traverses Turn 7 and heads into the back straight during the Pro Shootout race |
|
IMGP3370.jpg |
Nov 12 |
10 |
Race |
Peter Pope [FSC #84] waves to the Turn 7 F&C crew during the cool down lap after the Pro Shootout race |
|
IMGP3369.jpg |
Nov 12 |
10 |
Race |
Beau Borders [FS #13] waves to the Turn 7 F&C crew during the cool down lap after the Pro Shootout race |
|
IMGP3368.jpg |
Nov 12 |
10 |
Race |
Jean-Luc Liverato [ASR #17] waves to the Turn 7 F&C crew on the cool down lap after winning the Pro Shootout race |
|
IMGP3367.jpg |
Nov 12 |
10 |
Race |
Jean-Luc Liverato [ASR #17] waves to the Turn 7 F&C crew on the cool down lap after winning the Pro Shootout race |

|
IMGP3366.jpg |
Nov 12 |
10 |
Race |
Justin Huffman [FSC #1] and Jim Swain [FSC #9] fight their way from Turn 6 to Turn 7 during the Pro Shootout race |
|
IMGP3365.jpg |
Nov 12 |
10 |
Race |
Justin Huffman [FSC #1] and Jim Swain [FSC #9] fight their way through Turn 6 as Dennis Marklein [FSC #22] chases them during the Pro Shootout race |
|
IMGP3364.jpg |
Nov 12 |
10 |
Race |
Matthew Inge [FSC #20] leads the Formula SCCA class through Turn 7 and onto the back straight during the Pro Shootout race |
|
IMGP3362.jpg |
Nov 12 |
10 |
Race |
Keith McDonald [FSC #3] catches up with the Formula Special battle of Casey Carden [FS #06] and Beau Borders [FS #13] between turns six and seven during the Pro Shootout race |
|
IMGP3361.jpg |
Nov 12 |
10 |
Race |
Keith McDonald [FSC #3] catches up with the Formula Special battle of Casey Carden [FS #06] and Beau Borders [FS #13] between turns six and seven during the Pro Shootout race |
|
IMGP3360.jpg |
Nov 12 |
10 |
Race |
Keith McDonald [FSC #3] catches up with the Formula Special battle of Casey Carden [FS #06] and Beau Borders [FS #13] between turns six and seven during the Pro Shootout race |
|
IMGP3358.jpg |
Nov 12 |
10 |
Race |
Peter Pope [FSC #84] heads out of Turn 7 and onto the back straight during the Pro Shootout race |
|
IMGP3357.jpg |
Nov 12 |
10 |
Race |
Jean-Luc Liverato [ASR #17] uses the rumble strips at the apex of Turn 7 late in the Pro Shootout race |

|
IMGP3354.jpg |
Nov 12 |
10 |
Race |
Matthew Inge [FSC #20] heads for the apex of Turn 7 during the Pro Shootout race |
|
IMGP3352.jpg |
Nov 12 |
10 |
Race |
Russ McBride [CFC #02] passes the apex of Turn 7 during the Pro Shootout race |
|
IMGP3351.jpg |
Nov 12 |
10 |
Race |
Russ McBride [CFC #02] tracks out from Turn 6 during the Pro Shootout race |
|
IMGP3350.jpg |
Nov 12 |
10 |
Race |
Jean-Luc Liverato [ASR #17] gets ready to attack Turn 7 during the Pro Shootout race |

|
IMGP3349.jpg |
Nov 12 |
10 |
Race |
Jim Swain [FSC #9] gets past Casey Carden [FS #06] through Turn 6 and they both get ready to deal with Turn 7 during the Pro Shootout race |
|
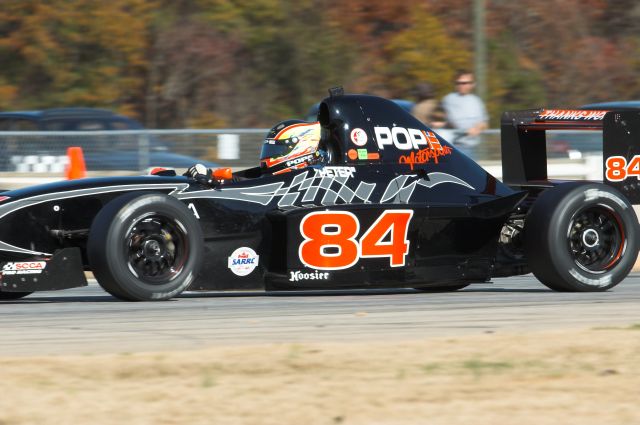
IMGP3343.jpg |
Nov 12 |
10 |
Race |
Race leader Jean-Luc Liverato [ASR #17] catches Peter Pope [FSC #84] between turns six and seven during the Pro Shootout race and works out a strategy to get past |
|
IMGP3342.jpg |
Nov 12 |
10 |
Race |
Russ McBride [CFC #02] heads for Turn 7's apex during the Pro Shootout race |
|
IMGP3341.jpg |
Nov 12 |
10 |
Race |
Jean-Luc Liverato [ASR #17] hits the apex of Turn 7 during the Pro Shootout race with the Turn 7 F&C crew watching closely |
|
IMGP3340.jpg |
Nov 12 |
10 |
Race |
Justin Huffman [FSC #1] and Matthew Inge [FSC #20] swapped the Formula SCCA lead several times during the Pro Shootout race |
|
IMGP3339.jpg |
Nov 12 |
10 |
Race |
Justin Huffman [FSC #1] and Matthew Inge [FSC #20] swapped the Formula SCCA lead several times during the Pro Shootout race |
|
IMGP3337.jpg |
Nov 12 |
10 |
Race |
Jean-Luc Liverato [ASR #17] between turns six and seven during the Pro Shootout race |
|
IMGP3336.jpg |
Nov 12 |
10 |
Race |
Jean-Luc Liverato [ASR #17] heads to track out at Turn 7 with the back straight and traffic ahead during the Pro Shootout race |
|
IMGP3333.jpg |
Nov 12 |
10 |
Race |
Peter Pope [FSC #84] exits Turn 6 and prepares to attack Turn 7 during the Pro Shootout race |
|
IMGP3332.jpg |
Nov 12 |
10 |
Race |
Two Formula SCCA racers take their battle through Turn 7 and onto the back straight during the Pro Shootout race |
|
IMGP3267.jpg |
Nov 12 |
10 |
Race |
Jean-Luc Liverato [ASR #17] leads the field through turns six and seven during the Pro Shootout race |
|
IMGP3265.jpg |
Nov 12 |
10 |
Race |
Beau Borders [FS #13] leads Keith McDonald [FSC #3] onto the back straight during the Pro Shootout race |
|
IMGP3264.jpg |
Nov 12 |
10 |
Race |
Russ McBride [CFC #02] nears the rumble strips tracking out of Turn 7 during the Pro Shootout race |
|
IMGP3263.jpg |
Nov 12 |
10 |
Race |
Peter Pope [FSC #84][ steams out of Turn 7 and onto the back straight during the Pro Shootout |
|
IMGP3262.jpg |
Nov 12 |
10 |
Race |
Dennis Marklein [FSC #22] chases Eric Cruz [FSC #86] out of Turn 7 and onto the back straight during the Pro Shootout race |
|
IMGP3261.jpg |
Nov 12 |
10 |
Race |
Justin Huffman [FSC #1] chases leader Jean-Luc Liverato [ASR #17] out of Turn 7 and onto the back straight during the Pro Shootout race |
|
IMGP3260.jpg |
Nov 12 |
10 |
Race |
Jean-Luc Liverato [ASR #17] hits the apex at Turn 7 during the Pro Shootout race |

|
IMGP3258.jpg |
Nov 12 |
10 |
Race |
Casey Carden [FS #06] turns in to Turn 7 during the Pro Shootout race |
|
IMGP3257.jpg |
Nov 12 |
10 |
Race |
Keith McDonald [FSC #3] enters Turn 7 during the Pro Shootout race |
|
IMGP3256.jpg |
Nov 12 |
10 |
Race |
Eric Cruz [FSC #86] leads classmates Dennis Marklein [FSC #22] and Peter Pope [FSC #84] out of Turn 6, after the pack passed Russ McBride [CFC #02] |
|
IMGP3255.jpg |
Nov 12 |
10 |
Race |
Jean-Luc Liverato [ASR #17] leads the Formula SCCA class leaders Justin Huffman [FSC #1] and Matthew Inge [FSC #20] up from Turn 6 during the Pro Shootout race |

|
IMGP3254.jpg |
Nov 12 |
10 |
Race |
Matthew Inge [FSC #20] attacks Turn 7 during the Pro Shootout race |

|
IMGP3253.jpg |
Nov 12 |
10 |
Race |
Jean-Luc Liverato [ASR #17] brakes for Turn 7 during the Pro Shootout race |

|
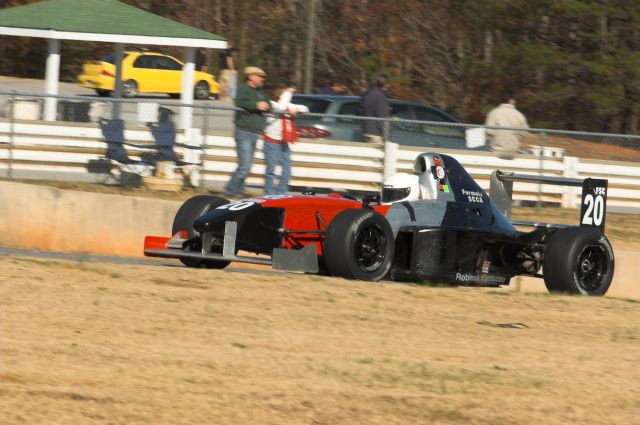
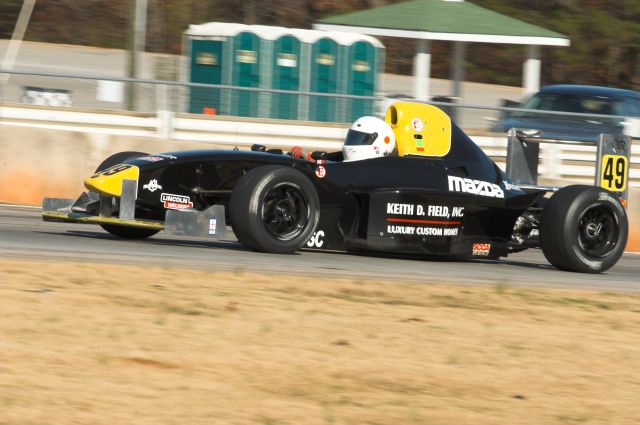
IMGP3248.jpg |
Nov 12 |
10 |
Race |
Keith Field [FSC #49] turns in to Turn 7 during the Pro Shootout race |
|
IMGP3247.jpg |
Nov 12 |
10 |
Race |
Keith McDonald [FSC #3] turns in to Turn 7 during the Pro Shootout race |
|
IMGP3246.jpg |
Nov 12 |
10 |
Race |
Peter Pope [FSC #84] turns in to Turn 7 during the Pro Shootout race |
|
IMGP3245.jpg |
Nov 12 |
10 |
Race |
Eric Crus [FSC #86] turns in to Turn 7 during the Pro Shootout race |
|
IMGP3244.jpg |
Nov 12 |
10 |
Race |
Justif Huffman [FSC #1] approaches the turn in point for Turn 7 on the first lap of the Pro Shootout race |
|
IMGP3243.jpg |
Nov 12 |
10 |
Race |
Jean-Luc Liverato [ASR #17] leads the field from Turn 6 to Turn 7 on the first lap of the Pro Shootout race |
|
IMGP3241.jpg |
Nov 12 |
10 |
Race |
Beau Borders [FS #13] negotiates Turn 7 during the reconnaissance lap before the Pro Shootout race |
|
IMGP3240.jpg |
Nov 12 |
10 |
Race |
Scott Woodruff [FS #05] waves to the Turn 7 flag crew during the reconnaissance lap before the Pro Shootout race |
|
IMGP3239.jpg |
Nov 12 |
10 |
Race |
Matthew Inge [FSC #20] negotiates Turn 7 during the reconnaissance lap before the Pro Shootout race |
|
IMGP3238.jpg |
Nov 12 |
10 |
Race |
Justin Huffman [FSC #1] waves to the Turn 7 flag crew during the reconnaissance lap before the Pro Shootout race |
|
IMGP3237.jpg |
Nov 12 |
10 |
Race |
Pole-sitter Jean-Luc Liverato [ASR #17] waves at the Turn 7 flag crew as he leads the field in the reconnaissance lap before the Pro Shootout race |
|
IMGP3236.jpg |
Nov 12 |
10 |
Race |
Pole-sitter Jean-Luc Liverato [ASR #17] leads the field in the reconnaissance lap before the Pro Shootout Group 10 ARRC race |
|
IMGP3300.jpg |
Nov 12 |
10 |
Race |
The Formula SCCA battle traverses Turn 7 and heads into the back straight during the Pro Shootout race |
|
IMGP3298.jpg |
Nov 12 |
10 |
Race |
Jean-Luc Liverato [ASR #17] uses the curbs at Turn 7 to get a better shot out into the back straight during the Pro Shootout race |
|
IMGP3297.jpg |
Nov 12 |
10 |
Race |
Jean-Luc Liverato [ASR #17] hits his track out marker at Turn 7 and attacks the back straight during the Pro Shootout race |
|
IMGP3296.jpg |
Nov 12 |
10 |
Race |
Keith McDonald [FSC #3] leaves Turn 7 and enters the back straight during the Pro Shootout race |
|
IMGP3295.jpg |
Nov 12 |
10 |
Race |
Beau Borders [FS #13] leaves the apex of Turn 7 and prepares to enter the back straight during the Pro Shootout race |

|
IMGP3294.jpg |
Nov 12 |
10 |
Race |
An unknown Formula SCCA car tracks out of Turn 7 and prepares to enter the back straight during the Pro Shootout race |

|
IMGP3291.jpg |
Nov 12 |
10 |
Race |
Casey Carden [FS #06] leaves Turn 7 and heads into the back straight during the Pro Shootout race |
|
IMGP3288.jpg |
Nov 12 |
10 |
Race |
Russ McBride [CFC #02] enters Turn 7 during the Pro Shootout race |
|
IMGP3287.jpg |
Nov 12 |
10 |
Race |
Eric Cruz [FSC #86] enters Turn 7 during the Pro Shootout race |
|
IMGP3284.jpg |
Nov 12 |
10 |
Race |
Jean-Luc Liverato [ASR #17] breaks toward the apex of Turn 7 during the Pro Shootout race |
|
IMGP3283.jpg |
Nov 12 |
10 |
Race |
Jean-Luc Liverato [ASR #17] breaks toward the apex of Turn 7 during the Pro Shootout race |

|
IMGP3282.jpg |
Nov 12 |
10 |
Race |
Casey Carden [FS #06] heads to the apex of Turn 7 during the Pro Shootout race |
|
IMGP3281.jpg |
Nov 12 |
10 |
Race |
Beau Borders [FS #13] breaks into Turn 7 during the Pro Shootout race |
|
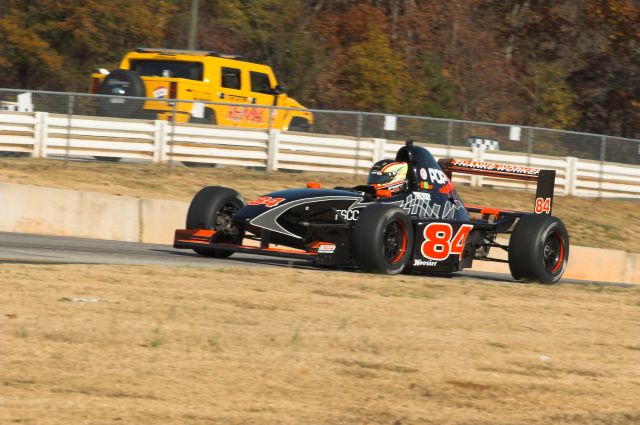
IMGP3268.jpg |
Nov 12 |
10 |
Race |
Justin Huffman [FSC #1] makes another pass through turns six and seven chasing Jean-Luc Liverato [ASR #17] for the overall lead |
|
IMGP3269.jpg |
Nov 12 |
10 |
Race |
Jim Swain [FSC #9] climbs from track out at Turn 6 toward Turn 7 during the Pro Shootout race |
|
IMGP3270.jpg |
Nov 12 |
10 |
Race |
Jim Swain [FSC #9] climbs from track out at Turn 6 toward Turn 7 as Dennis Marklein [FSC #22] enters Turn 6 chasing him during the Pro Shootout race |
|
IMGP3271.jpg |
Nov 12 |
10 |
Race |
Dennis Marklein [FSC #22] heads into Turn 7 chasing Jim Swain [FSC #9] during the Pro Shootout race |
|
IMGP3272.jpg |
Nov 12 |
10 |
Race |
Peter Pope [FSC #84] heads into Turn 7 during the Pro Shootout race |
|
IMGP3273.jpg |
Nov 12 |
10 |
Race |
Russ McBride [CFC #02] heads for the apex of Turn 7 during the Pro Shootout race |
|
IMGP3274.jpg |
Nov 12 |
10 |
Race |
Keith Field [FSC #49] heads to the apex of Turn 7 during the Pro Shootout race |
|
IMGP3275.jpg |
Nov 12 |
10 |
Race |
Jean-Luc Liverato [ASR #17] leads the field into Turn 7 during the Pro Shootout |
|
IMGP3276.jpg |
Nov 12 |
10 |
Race |
Justin Huffman [FSC #1] turns in to Turn 7 during the Pro Shootout race |

|
IMGP3277.jpg |
Nov 12 |
10 |
Race |
Jim Swain [FSC #9] turns in to Turn 7 during the Pro Shootout race |
|
IMGP3278.jpg |
Nov 12 |
10 |
Race |
Dennis Marklein [FSC #22] hits the apex at Turn 7 during the Pro Shootout race |
|
IMGP3279.jpg |
Nov 12 |
10 |
Race |
Russ McBride [CFC #02] breaks toward the apex of Turn 7 during the Pro Shootout race |
|
IMGP3280.jpg |
Nov 12 |
10 |
Race |
Keith Field [FSC #49] breaks into Turn 7 during the Pro Shootout race |
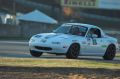
| Thumbnail |
Image Name |
Date |
Run Group |
Session |
Caption |

|
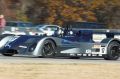
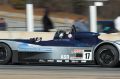
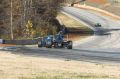
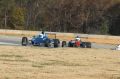
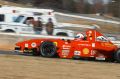
IMGP3456.jpg |
Nov 12 |
11 |
Race |
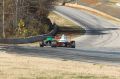
Jim Jandrisevits [IT7 #35] enters Turn 1 late in the Enduro |
|
IMGP3455.jpg |
Nov 12 |
11 |
Race |
David Kim [ITS #27], Jim Jandrisevits [IT7 #35] and Joe Tenney [ITA #46] fight for position entering Turn 1 late in the Enduro |

|
IMGP3454.jpg |
Nov 12 |
11 |
Race |
Bob Stretch [ITA #09] and Steve Devinney [SSM #88] lead part of the field down the front stretch, three wide, late in the Enduro |
|
IMGP3453.jpg |
Nov 12 |
11 |
Race |
Steve Damerow [ASM #01] returns to the Enduro after the second of two mandatory pit stops |
|
IMGP3451.jpg |
Nov 12 |
11 |
Race |
Chuck Newman [ITO #92] roars into Turn 1 late in the Enduro |
|
IMGP3449.jpg |
Nov 12 |
11 |
Race |
Sean Dernehl [IT7 #03] leads Jose Rodriguez [ITS #5] into Turn 1 late in the Enduro |
|
IMGP3447.jpg |
Nov 12 |
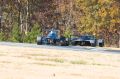
11 |
Race |
Dr. Mike Powell [ITB #6] and Michael Glassburner [ITB #18] duke it out for position going into Turn 1 late in the Enduro |

|
IMGP3445.jpg |
Nov 12 |
11 |
Race |
Eventual overall winner Kent Thompson [ITS #86] leads the field into Turn 1 late in the Enduro |
|
IMGP3443.jpg |
Nov 12 |
11 |
Race |
Moderate pit activity late in the Enduro |

|
IMGP3442.jpg |
Nov 12 |
11 |
Race |
Sean Dernehl [IT7 #03] returns to the track after one of the Enduro's two mandatory pit stops |
|
IMGP3441.jpg |
Nov 12 |
11 |
Race |
Jason Holland [SSM #28] returns to the track after one of the Enduro's two mandatory pit stops |
|
IMGP3440.jpg |
Nov 12 |
11 |
Race |
Colin Harmer [ITA #42] returns to the track after one of the Enduro's two mandatory pit stops |
|
IMGP3439.jpg |
Nov 12 |
11 |
Race |
Julia Dawson [ASM #55] returns to the track after one of the Enduro's two mandatory pit stops |
|
IMGP3436.jpg |
Nov 12 |
11 |
Race |
Part of the Enduro field covers the front stretch and races for Turn 1 as the green flag flies after a full course caution |
|
IMGP3434.jpg |
Nov 12 |
11 |
Race |
Robert Huffmaster [ITS #26] leads Frank Barba [ITO #04] and one of the ITS BMWs into Turn 1 during the Enduro |
|
IMGP3433.jpg |
Nov 12 |
11 |
Race |
Scott Whitmire [ITS #10] returns to the track after one of two mandatory pit stops during the Enduro |
|
IMGP3432.jpg |
Nov 12 |
11 |
Race |
Part of the Enduro field covers the front stretch and races for Turn 1 as the green flag flies after a full course caution |

|
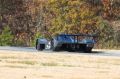
IMGP3487.jpg |
Nov 12 |
11 |
Race |
Michael Glassburner [ITB #18] goes into the tire barrier at the end of the pit road wall just yards short of the checkered flag in the Enduro |

|
IMGP3486.jpg |
Nov 12 |
11 |
Race |
Michael Glassburner [ITB #18] goes into the tire barrier at the end of the pit road wall just yard short of the checkered flag in the Enduro |
|
IMGP3485.jpg |
Nov 12 |
11 |
Race |
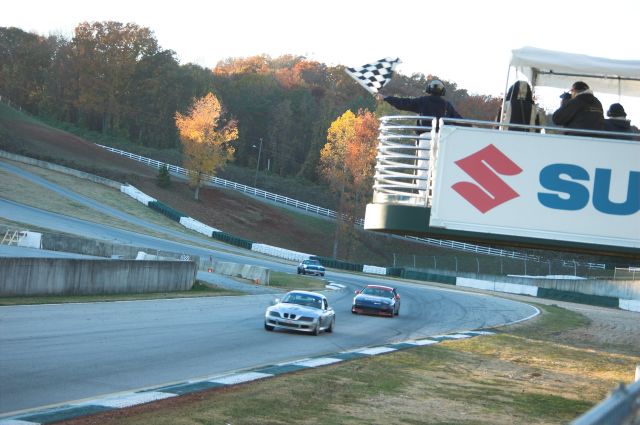
The checkered flag waves for enduro winner Kent Thompson [ITS #86] |

|
IMGP3484.jpg |
Nov 12 |
11 |
Race |
The ASM class leading pack of Miatas catches Richard Ruck [ITC #11] coming out of Turn 12 and during the Enduro |
|
IMGP3476.jpg |
Nov 12 |
11 |
Race |
Jim Jandrisevits [IT7 #35] does battle down the front straight with one of the BSI Racing prepared Miatas during the Enduro |

|
IMGP3475.jpg |
Nov 12 |
11 |
Race |
Robert Huffmaster [ITS #26] enters the pits very late for his second mandatory pit stop during the Enduro |
|
IMGP3474.jpg |
Nov 12 |
11 |
Race |
Sean Dernehl [IT7 #03], Dr. Mike Powell [ITB #6], and Michael Glassburner [ITB #18] form a tight pack as they come out of Turn 12 and across the start/finish line near the end of the Enduro |
|
IMGP3473.jpg |
Nov 12 |
11 |
Race |
Frank Barba [ITO #04] weaves through slower thraffic that includes Jim Jandrisevits [IT7 #35] and Michael Reece [ITB #69] during the Enduro |
|
IMGP3472.jpg |
Nov 12 |
11 |
Race |
David Kim [ITS #27] leads Steve Devinney [SSM #88] out of Turn 12 and onto the front straight during the ARRC Enduro |
|
IMGP3470.jpg |
Nov 12 |
11 |
Race |
Richard Ruck [ITC #11] holds off Steve Damerow [ASM #01] down the hill and through Turn 12 during the Enduro |
|
IMGP3468.jpg |
Nov 12 |
11 |
Race |
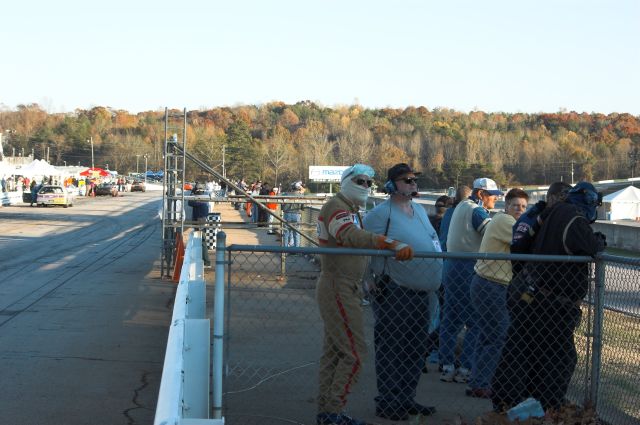
Family, friends, and crew watch the end of the ARRC Enduro from the fence between pit lane and the front stretch |
|
IMGP3467.jpg |
Nov 12 |
11 |
Race |
Second place overall Ray Huffmaster [ITU #65] takes on fuel during his second mandatory pit stop in the ARRC Enduro |

|
IMGP3466.jpg |
Nov 12 |
11 |
Race |
Second place overall Ray Huffmaster [ITU #65] enters pit lane for his second mandatory pit stop during the ARRC Enduro |
|
IMGP3465.jpg |
Nov 12 |
11 |
Race |
Bob Stretch [ITA #09] enters pit road for his second mandatory pit stop during the waning laps of the ARRC Enduro |
|
IMGP3462.jpg |
Nov 12 |
11 |
Race |
Dr. Mike Powell [ITB #6] returns to the waning moments of the Enduro after completing his second of two mandatory pit stops |

|
IMGP3461.jpg |
Nov 12 |
11 |
Race |
Jim Jandrisevits [IT7 #35] goes a lap down to Colin Harmer [ITA #42] as they enter Turn 1 in the Enduro |
|
IMGP3459.jpg |
Nov 12 |
11 |
Race |
Michael Reece [ITB #69] drafts Trever Degioanni [ITB #60] down the front straight and into Turn 1 in the waning laps of the Enduro |
|
IMGP3458.jpg |
Nov 12 |
11 |
Race |
Overall winner Kent Thompson [ITS #86] starts another lap at Turn 1 in the waning moments of the Enduro |
|
IMGP3397.jpg |
Nov 12 |
11 |
Race |
George Kerchner [ITO #22] leads Evan Darling [ITA #71] into the braking zone for Turn 6 during the Enduro |
|
IMGP3396.jpg |
Nov 12 |
11 |
Race |
Michael Fine [ITS #57] brakes hard going into Turn 6 during the Enduro |
|
IMGP3395.jpg |
Nov 12 |
11 |
Race |
Brion Gluck's yellow Mustang [ITO #87] finally comes to a rest on the grass just before Turn 6 during the Enduro |
|
IMGP3393.jpg |
Nov 12 |
11 |
Race |
Colin Harmer [ITA #42] brakes hard going into Turn 6 during the Enduro |
|
IMGP3391.jpg |
Nov 12 |
11 |
Race |
Chuck Reynolds [ITA #38] brakes hard entereing Turn 6 during the Enduro |
|
IMGP3387.jpg |
Nov 12 |
11 |
Race |
Richard Ruck [ITC #11] brakes hard entering Turn 6 during the Enduro |

|
IMGP3386.jpg |
Nov 12 |
11 |
Race |
A crowd streams over the hill past Turn 5 as the yellow Mustang of Brion Gluck [ITO #87] slows on the grass after a mechanical failure during the Enduro |
|
IMGP3385.jpg |
Nov 12 |
11 |
Race |
Enduro winner Kent Thompson [ITS #86] brakes hard entering Turn 6 |
|
IMGP3384.jpg |
Nov 12 |
11 |
Race |
Dr. Mike Powell [ITB #6] makes a pass on Devin Box [ITC #12] and Richard Ruck [ITC #11] tries to follow in his wake going into Turn 6 in the Enduro |
|
IMGP3383.jpg |
Nov 12 |
11 |
Race |
Steve Devinney [SSM #88] passes really close by Tim Pitts [ITB #97] during the Enduro |
|
IMGP3382.jpg |
Nov 12 |
11 |
Race |
Michael Reece [ITB #69] leads Jim Jandrisevits [IT7 #35] and David Loper [ITB #37] into Turn 6 during the Enduro |
|
IMGP3380.jpg |
Nov 12 |
11 |
Race |
Lyonel Kent [ITA #95] tries to put a move on Richard Fisher [ASM #77] going into the braking zone for Turn 6 during the Enduro |
|
IMGP3379.jpg |
Nov 12 |
11 |
Race |
Ray Huffmaster [ITU #65] leads Robert Huffmaster [ITS #26] into the braking zone for Turn 6 during the Enduro |
|
IMGP3378.jpg |
Nov 12 |
11 |
Race |
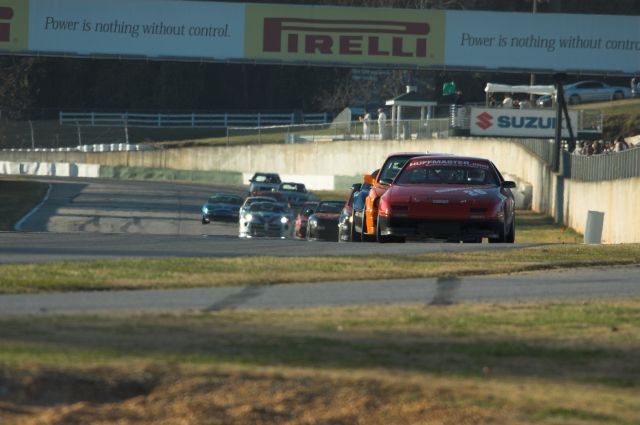
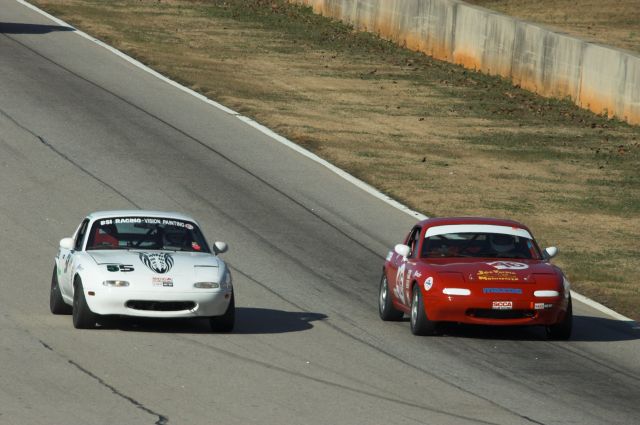
A huge pack of Improved Touring and Spec Miata cars crest the hill just past Turn 5 for the run down to Turn 6 during the Enduro |

|
IMGP3377.jpg |
Nov 12 |
11 |
Race |
A huge pack of Improved Touring and Spec Miata cars crest the hill just past Turn 5 for the run down to Turn 6 during the Enduro |

|
IMGP3375.jpg |
Nov 12 |
11 |
Race |
A huge pack of Improved Touring and Spec Miata cars crest the hill just past Turn 5 for the run down to Turn 6 during the Enduro |

|
IMGP3373.jpg |
Nov 12 |
11 |
Race |
Michael Fine [ITS #57] chases Bob Stretch [ITA #09] into the braking zone for Turn 6 during the Enduro |
|
IMGP3372.jpg |
Nov 12 |
11 |
Race |
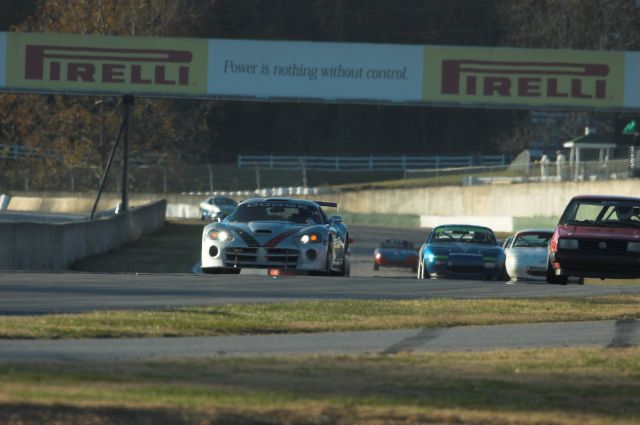
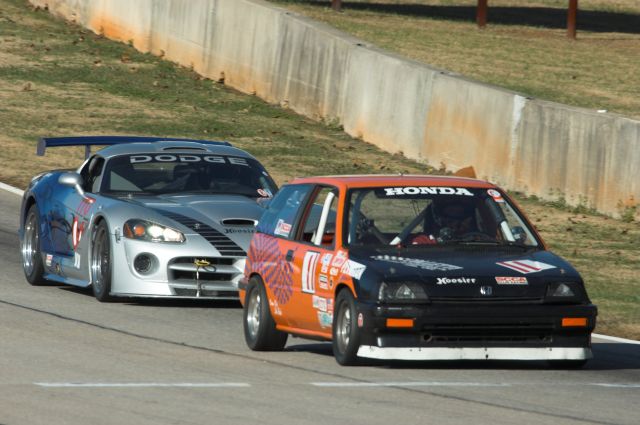
The Dodge Viper of Frank Barba [ITO #04] brakes hard heading into Turn 6 during the Enduro |
|
IMGP3431.jpg |
Nov 12 |
11 |
Race |
A chunk of the Enduro field covers the front stretch and races for Turn 1 as the green flag flies after a full course caution |
|
IMGP3429.jpg |
Nov 12 |
11 |
Race |
Some of the Enduro field covers the front stretch and races for Turn 1 as the green flag flies after a full course caution |
|
IMGP3428.jpg |
Nov 12 |
11 |
Race |
Part of the Enduro field covers the front stretch and races for Turn 1 as the green flag flies after a full course caution |
|
IMGP3427.jpg |
Nov 12 |
11 |
Race |
A chunk of the Enduro field covers the front stretch and races for Turn 1 as the green flag flies after a full course caution |
|
IMGP3423.jpg |
Nov 12 |
11 |
Race |
Lynn Kraft [ITS #39] and Beau Buisson [ITA #05] give Robert Fitzgerald [ASM #23] room to pass entering Turn 6 during the Enduro |
|
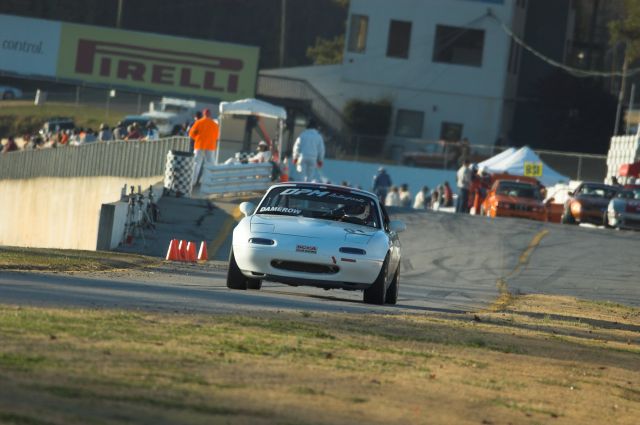
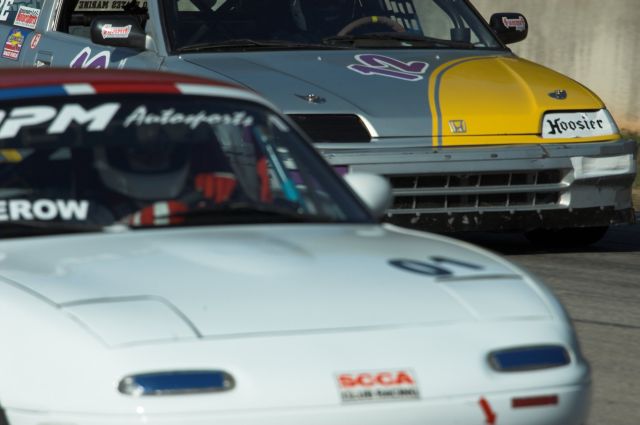
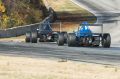
IMGP3422.jpg |
Nov 12 |
11 |
Race |
A crowd fights for track space on the run from the hill at Turn 5 into Turn 6 during the Enduro |
|
IMGP3421.jpg |
Nov 12 |
11 |
Race |
A crowd fights for track space on the run from the hill at Turn 5 into Turn 6 during the Enduro |
|
IMGP3419.jpg |
Nov 12 |
11 |
Race |
A clse up of Karl Fischer [ASM #17] powering through a pass into Turn 6 during the Enduro |
|
IMGP3418.jpg |
Nov 12 |
11 |
Race |
Karl Fischer [ASM #17] and Chuck Reynolds [ITA #38] dive past one of the BSI racing Miatas in the braking zone for Turn 6 during the Enduro |
|
IMGP3416.jpg |
Nov 12 |
11 |
Race |
Lyonel Kent brakes hard entering Turn 6 during the Enduro |

|
IMGP3415.jpg |
Nov 12 |
11 |
Race |
Michael Fine [ITS #57] drives hard into Turn 6 during the Enduro |
|
IMGP3407.jpg |
Nov 12 |
11 |
Race |
Having lost his front spoiler early in the Enduro, Kevin Fandozzi [ITA #24] powers on |
|
IMGP3405.jpg |
Nov 12 |
11 |
Race |
Sam Lockwood [ITU #70] brakes hard going into Turn 6 during the Enduro |
|
IMGP3404.jpg |
Nov 12 |
11 |
Race |
The Huffmasters chase each other into Turn 6 during the Enduro |
|
IMGP3403.jpg |
Nov 12 |
11 |
Race |
Brion Gluck [ITO #87] abandons his car on the grass at driver's right near the entry to Turn 6 after only two laps completed during the Enduro |
|
IMGP3402.jpg |
Nov 12 |
11 |
Race |
Steve Damerow [ASM #01] slashes past Devin Box [ITC #12] in the braking zone for Turn 6 during the enduro |

|
IMGP3401.jpg |
Nov 12 |
11 |
Race |
Frank Barba [ITO #04] catches Richard Ruck [ITC #11] as they get into the braking zone for turn size during the Enduro |

|
IMGP3400.jpg |
Nov 12 |
11 |
Race |
Julia Dawson [ASM #55] gives Joe Tenney [ITA #46] room to pass going into Turn 6 during the Enduro |